- Posts: 3874
- Thank you received: 2963
A was for Austin, but now B is for Bedford
4 years 1 month ago #207553
by cobbadog
Cheers Cobba & Cobbarette
Coopernook, The Centre of our Universe
Working on more play time.
Replied by cobbadog on topic A was for Austin, but now B is for Bedford
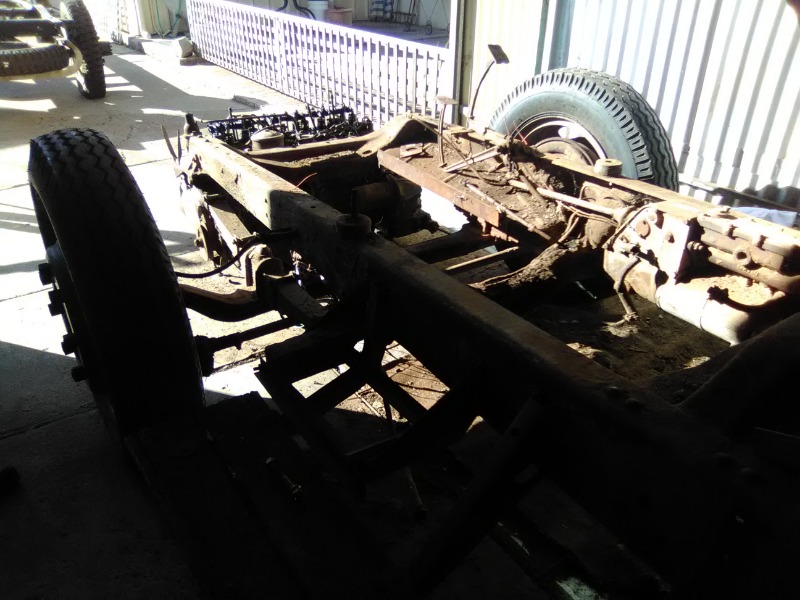
I like the red dust sitting on the insides of the chassis rails but outside nice and black and when wet shiney too. You can see on the rear cross member where a chain or aire rope was wrapped around it and dragged something behind it or it got dragged out of somewhere as the C section has partially been squashed.
Hopefully you can proceed with the project and make a Hybrid, they are fun as I did it with a mower i=once to upset the purist and it worked.
Hopefully you can proceed with the project and make a Hybrid, they are fun as I did it with a mower i=once to upset the purist and it worked.
Cheers Cobba & Cobbarette
Coopernook, The Centre of our Universe
Working on more play time.
Please Log in to join the conversation.
4 years 1 month ago - 4 years 1 month ago #207574
by PDU
Replied by PDU on topic A was for Austin, but now B is for Bedford
Some dust, some light rust cobbadog :oops: you obviously look closely. :huh:
And to continue: First step for the day was to disconnect the tailshaft and swing the centre bearing to one side. (Actually "the day" was 6/3/20) Next was to undo the gearbox bolts, three were external (not two as in the manual) and there was one remaining hole that indicated the bolt was inside the clutch housing. After removing the clutch cover this was not the case, no bolt in there - but there was a considerable amount of debris and the renmants of a wasps nest! :ohmy:
Despite the weight, the gear box was easy to remove, and was left under the truck until the cab was moved when access to lift it out would be easier.
The main part of the day’s extravaganza then began and the one-man-army commenced his systematical levering of the cab, up and rearwards. Slowly the cab inched backwards, precariously supported and balanced on some wooden blocks and using a heavy metal pole to instigate movement. The two lower pictures were taken about an hour apart; the last being after the cab had been moved back out of the way and the gearbox had been lifted out from underneath the chassis and placed into the battery box.")
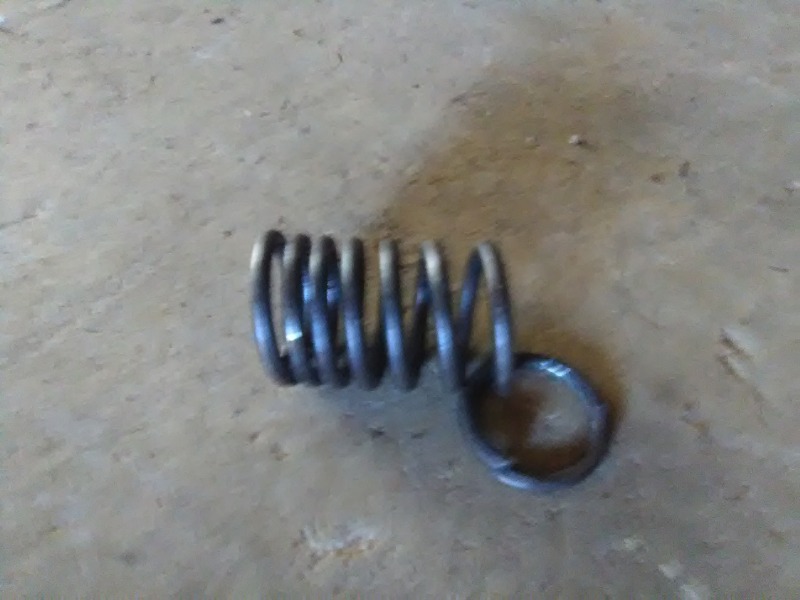
In order to investigate the state of the engine, particularly the valve with the broken valve spring, removing the head was contemplated. However, the need to progress with the transfer of measurements from the O type chassis to the M type chassis was considered to be more important.
Content with the day’s achievements, and feeling a wee bit tired, engine removal was postponed until the next day . . . :whistle:
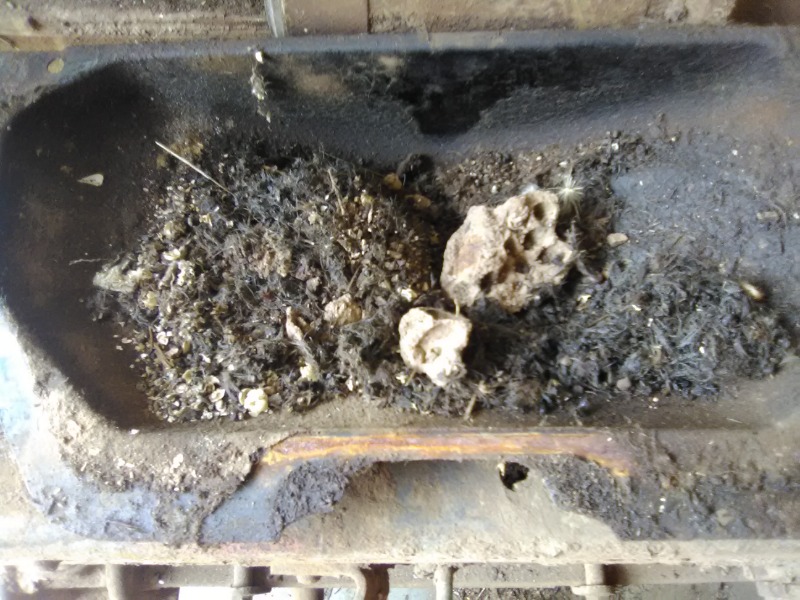

And to continue: First step for the day was to disconnect the tailshaft and swing the centre bearing to one side. (Actually "the day" was 6/3/20) Next was to undo the gearbox bolts, three were external (not two as in the manual) and there was one remaining hole that indicated the bolt was inside the clutch housing. After removing the clutch cover this was not the case, no bolt in there - but there was a considerable amount of debris and the renmants of a wasps nest! :ohmy:
Despite the weight, the gear box was easy to remove, and was left under the truck until the cab was moved when access to lift it out would be easier.
The main part of the day’s extravaganza then began and the one-man-army commenced his systematical levering of the cab, up and rearwards. Slowly the cab inched backwards, precariously supported and balanced on some wooden blocks and using a heavy metal pole to instigate movement. The two lower pictures were taken about an hour apart; the last being after the cab had been moved back out of the way and the gearbox had been lifted out from underneath the chassis and placed into the battery box.
In order to investigate the state of the engine, particularly the valve with the broken valve spring, removing the head was contemplated. However, the need to progress with the transfer of measurements from the O type chassis to the M type chassis was considered to be more important.
Content with the day’s achievements, and feeling a wee bit tired, engine removal was postponed until the next day . . . :whistle:
Last edit: 4 years 1 month ago by PDU.
Please Log in to join the conversation.
4 years 1 month ago - 4 years 1 month ago #207575
by PDU
Replied by PDU on topic A was for Austin, but now B is for Bedford
. . . and I went back into the house. I filled in my B for progress record, but then wife started watching a show on television that didn’t appeal to me and I thought, “I wonder if I can pull the engine out while her show is on?”
I like a challenge, so away I went. With a minimal amount of bolts left to undo, the engine hoist was dragged around to the carport and within half an hour the engine was out and sitting on the ground.
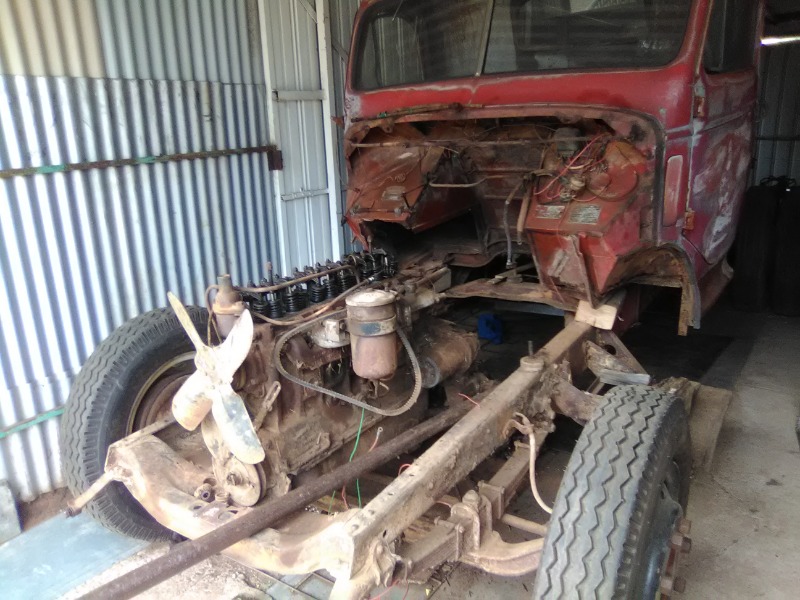
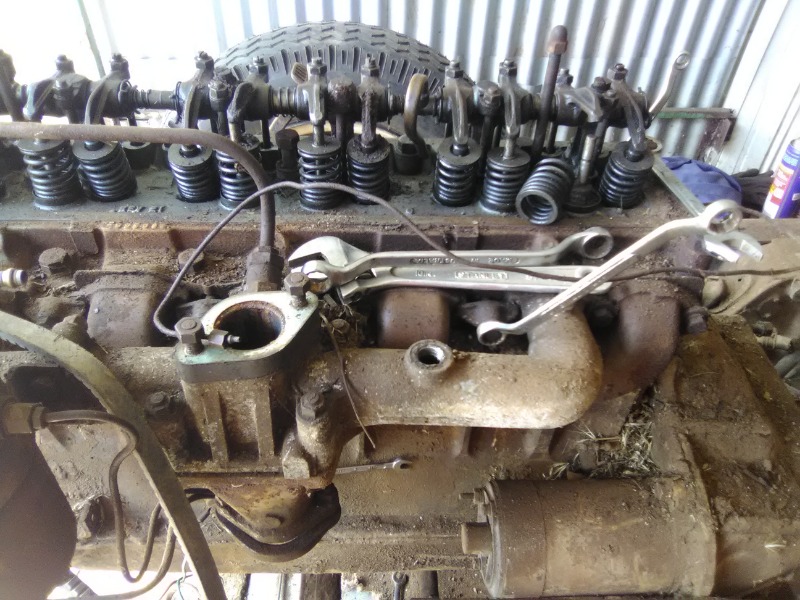
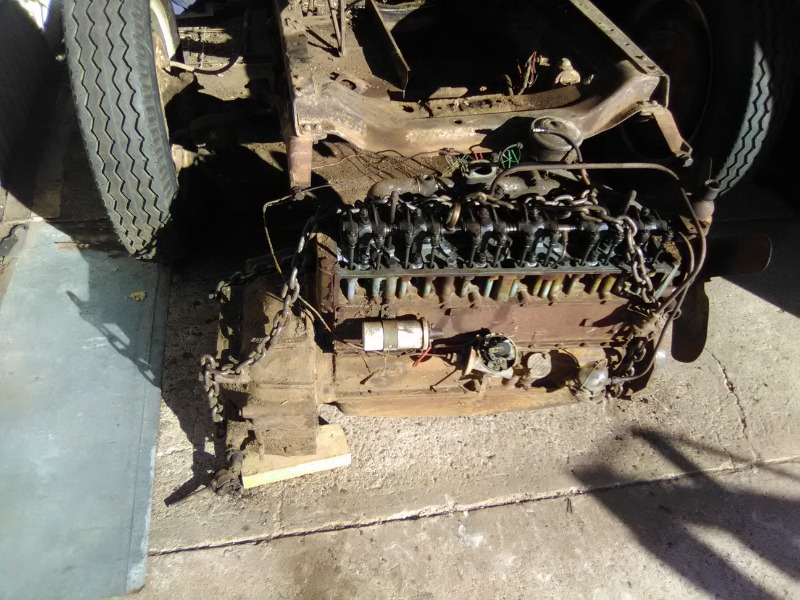
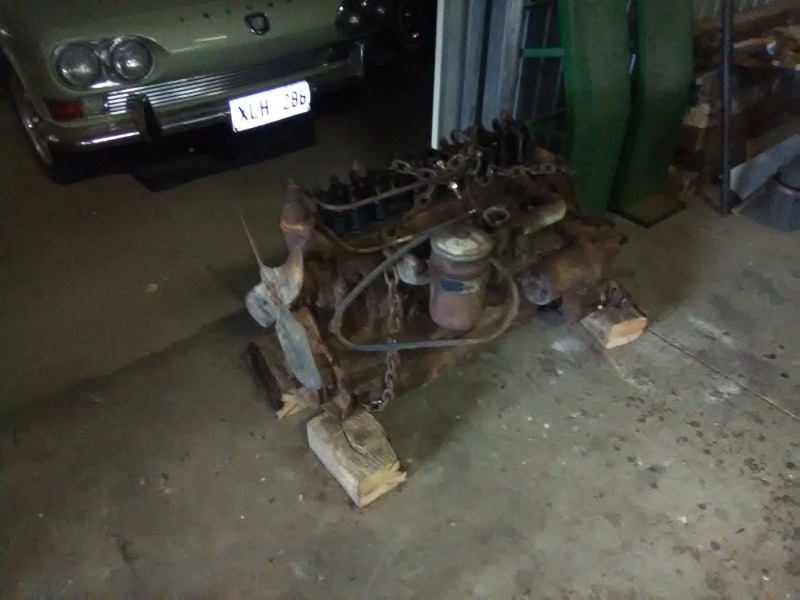
The first picture shows how I had left the engine with all the spanners needed to remove manifolds, side plate, etc, and ready to pull the head. These spanners were all put to one side and a long chain was attached using the upper gearbox bolts and under the front of the sump. Hey ho, all too easy.
Second picture was difficult because of the setting sun and shadows within the carport, so I tried again from the opposite direction - not much better but at least it gives an idea of where I was up to.
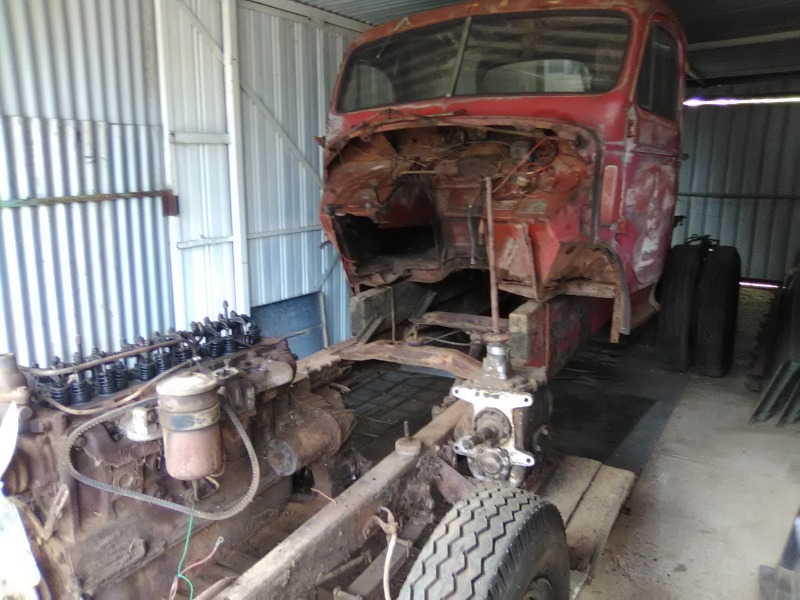
And of course the last picture is how the day ended with the engine tucked in close to the chassis so I could close the carport door.

So, with things progressing at a faster rate than most of my projects, the result was a satisfying finale to the day.
I like a challenge, so away I went. With a minimal amount of bolts left to undo, the engine hoist was dragged around to the carport and within half an hour the engine was out and sitting on the ground.
The first picture shows how I had left the engine with all the spanners needed to remove manifolds, side plate, etc, and ready to pull the head. These spanners were all put to one side and a long chain was attached using the upper gearbox bolts and under the front of the sump. Hey ho, all too easy.
Second picture was difficult because of the setting sun and shadows within the carport, so I tried again from the opposite direction - not much better but at least it gives an idea of where I was up to.
And of course the last picture is how the day ended with the engine tucked in close to the chassis so I could close the carport door.
So, with things progressing at a faster rate than most of my projects, the result was a satisfying finale to the day.
Last edit: 4 years 1 month ago by PDU.
Please Log in to join the conversation.
4 years 1 month ago #207611
by Sarge
Sarge")
ACCO Owner, Atkinson dreamer.
Replied by Sarge on topic A was for Austin, but now B is for Bedford
PDU, I have enjoyed the Bedford experience with a lovely O. And made a mistake you too made. Sadly I pulled the saggy roof lining out in bits too. It's made of unobtanium. Originally hot/wet pressed Masonite or similar product. I never worked out how to replace or replicate it. Truck has a new home now with higher priority, but no solution other than fabric or vinyl at this stage.
Keep the story coming.
Keep the story coming.
Sarge
ACCO Owner, Atkinson dreamer.
Please Log in to join the conversation.
4 years 1 month ago - 4 years 1 month ago #207612
by PDU
Replied by PDU on topic A was for Austin, but now B is for Bedford
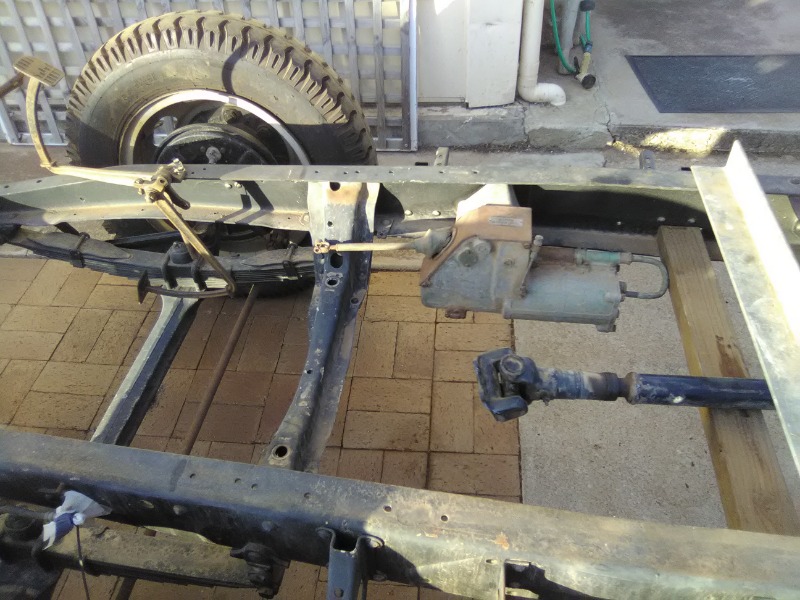
Much easier getting to things once the engine was out of the way. The rivets holding the mounting for the pedals were drilled out and the pedals wire brushed clean. Measurements from front crossmember to the cab mounting holes was transferred to the new chassis, holes were drilled but the mounting plates were not bolted in place yet as other work still required with them.
The cleanest power vac from the Quorn spare parts was mounted onto the existing holes, knowing the link between pedals and master cylinder will need to be elongated, only difference will be the master cylinder will now be under the drivers seat rather than on the floor under his feet.
The radiator and front fender support bar was also wire brushed clean, the holes measured and drilled. The worn out bolts and tubing spacers were replaced and the support piece bolted in place.
At this point I was undecided about transferring the crossmember for the cab rear support from the old chassis, which would mean drilling out fourteen rivets, and possibly with sections that would foul existing mountings on the new chassis???
The engine was moved into the main garage where I have more room to work around it. I also have decent lighting in there
PS The head lining was a pseudo leather vinyl Sarge :-x :oops:
 and a radio.
The cleanest power vac from the Quorn spare parts was mounted onto the existing holes, knowing the link between pedals and master cylinder will need to be elongated, only difference will be the master cylinder will now be under the drivers seat rather than on the floor under his feet.
The radiator and front fender support bar was also wire brushed clean, the holes measured and drilled. The worn out bolts and tubing spacers were replaced and the support piece bolted in place.
At this point I was undecided about transferring the crossmember for the cab rear support from the old chassis, which would mean drilling out fourteen rivets, and possibly with sections that would foul existing mountings on the new chassis???
The engine was moved into the main garage where I have more room to work around it. I also have decent lighting in there
PS The head lining was a pseudo leather vinyl Sarge :-x :oops:
Last edit: 4 years 1 month ago by PDU.
Please Log in to join the conversation.
4 years 1 month ago #207617
by Pierre
Pierre
Replied by Pierre on topic A was for Austin, but now B is for Bedford
Is that a Triumph 2000 lurking in the background PDU? Nice.
If it’s yours we have similar tastes, I have a MK 2 Jag I restored a few years back.
Cheers Pierre
If it’s yours we have similar tastes, I have a MK 2 Jag I restored a few years back.
Cheers Pierre
Pierre
The following user(s) said Thank You: cobbadog
Please Log in to join the conversation.
4 years 1 month ago - 4 years 1 month ago #207624
by PDU
Replied by PDU on topic A was for Austin, but now B is for Bedford
That's one of three Pierre, one with the standard twin strombergs, one with triple strombergs, and one with a 3.8 V6 in it. :woohoo: I thought our "similar tastes' were reasonably evident already? :lol:
But I didn't see your Jag hiding anywhere when I called by . . . ?
AND as the engine was opened up I'll repeat what I have posted elsewhere but in a shortened form (From me? Dream on!):
Valve spring broke, valve stayed down, piston and valve contact, hole punched in piston, valve stem snapped, piston disintegrated and crown broke away, valve embedded itself back in valve seat (very selective, but arse about face), con rod and remains of piston punched the cylinder wall apart, engine finally quit.
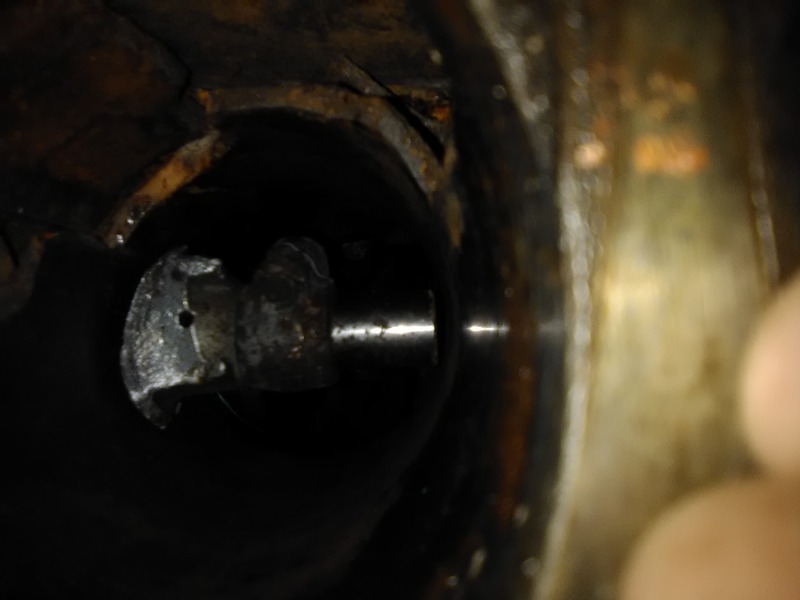
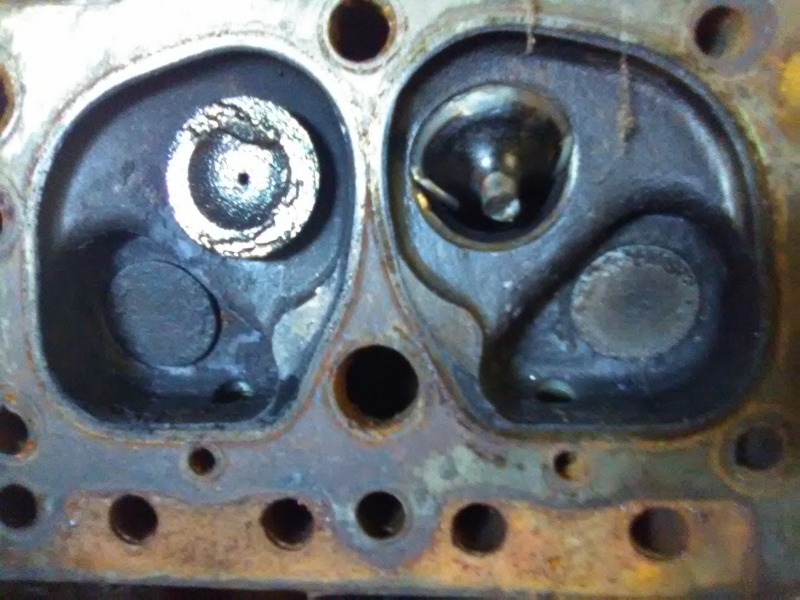
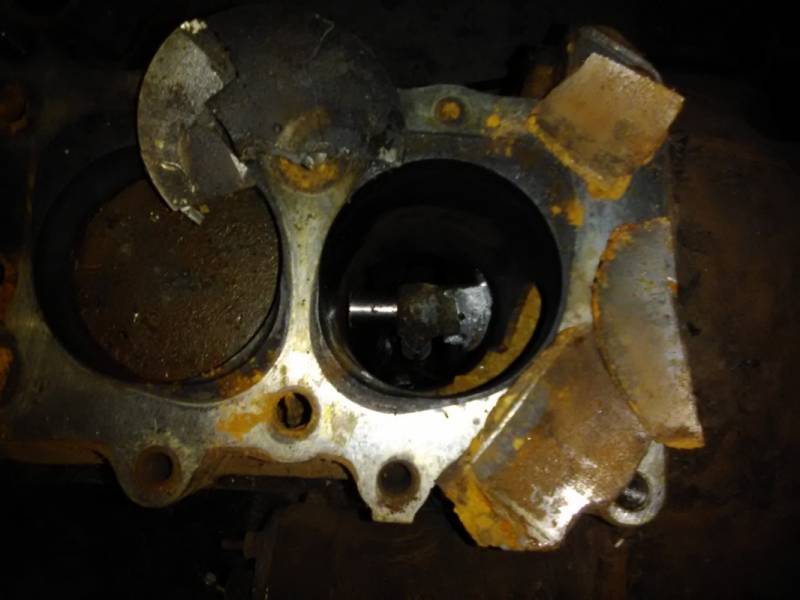
Needless to say I now am looking for a reasonable running 214 . . .
Also, the Austin has moved on to greener pastures I think? Advertised Thursday, sold in two hours, and picked up Friday.

But I didn't see your Jag hiding anywhere when I called by . . . ?
AND as the engine was opened up I'll repeat what I have posted elsewhere but in a shortened form (From me? Dream on!):
Valve spring broke, valve stayed down, piston and valve contact, hole punched in piston, valve stem snapped, piston disintegrated and crown broke away, valve embedded itself back in valve seat (very selective, but arse about face), con rod and remains of piston punched the cylinder wall apart, engine finally quit.
Needless to say I now am looking for a reasonable running 214 . . .
Also, the Austin has moved on to greener pastures I think? Advertised Thursday, sold in two hours, and picked up Friday.
Last edit: 4 years 1 month ago by PDU.
Please Log in to join the conversation.
4 years 1 month ago #207651
by cobbadog
Cheers Cobba & Cobbarette
Coopernook, The Centre of our Universe
Working on more play time.
Replied by cobbadog on topic A was for Austin, but now B is for Bedford
Sounds like it was advertised too cheap to sell that quick. Look at all the extra room you now have.
Cheers Cobba & Cobbarette
Coopernook, The Centre of our Universe
Working on more play time.
Please Log in to join the conversation.
4 years 1 month ago - 4 years 1 month ago #207665
by PDU
Replied by PDU on topic A was for Austin, but now B is for Bedford
Unlike some money hungry types out there cobbadog I am happy to cover what it owes me and a wee bit extra for my efforts along the way. My wife is wrapped in all the driveway space now. People who have bought gear from me at swap meets are amazed by my, "What do you reckon it's really worth, and how much would you be happy to pay?" approach - then, when they have said twice as much as I had in mind, tell them they can have it for ten or twenty dollars less than they have offered, at which they grab it quick and move off happy. No point setting ridiculous prices, otherwise you only end up taking the stuff back home again.
Last edit: 4 years 1 month ago by PDU.
The following user(s) said Thank You: cobbadog
Please Log in to join the conversation.
4 years 1 month ago - 4 years 1 month ago #207686
by PDU
Replied by PDU on topic A was for Austin, but now B is for Bedford
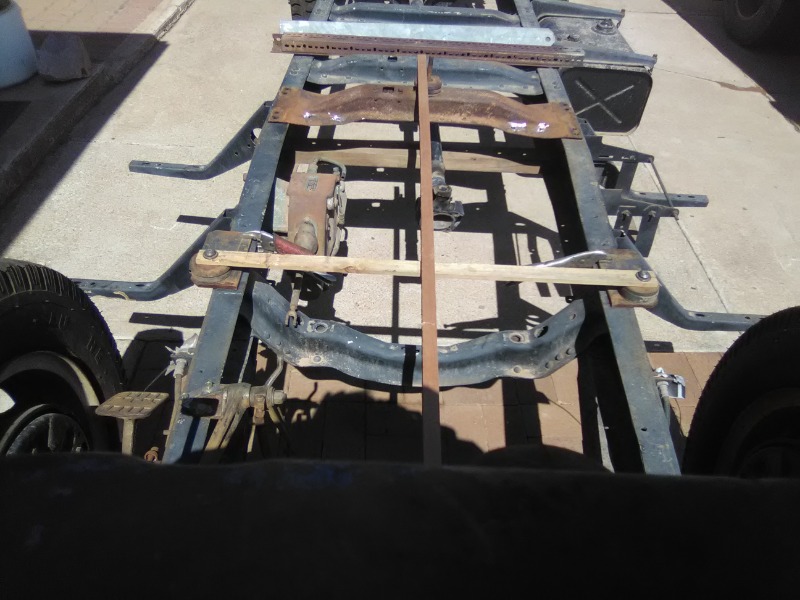
Measuring was the order for the day to ensure the cab mounting points would end up in the correct positions. This was complicated by the fact that the front cab mountings sit just wider than the M type chassis which, unlike the O type chassis, narrows just forward of the back face of the cab. This can be solved by retaining the cab as is and having “wings” on the outer edge of the chassis rails, OR, by modifying the mounting points on the cab inboard to suit the chassis. Considerable time was spent determining what would be the best way to do this - ideally without resorting to using a welder.
Eventually the decision was made to use a section of steel plate bolted to the upper chassis rail with a tapped hole for the cab mounting bolt. This would alleviate the need for a nut, which would not clear the chassis side anyway as the side of the hole barely cleared the chassis width.
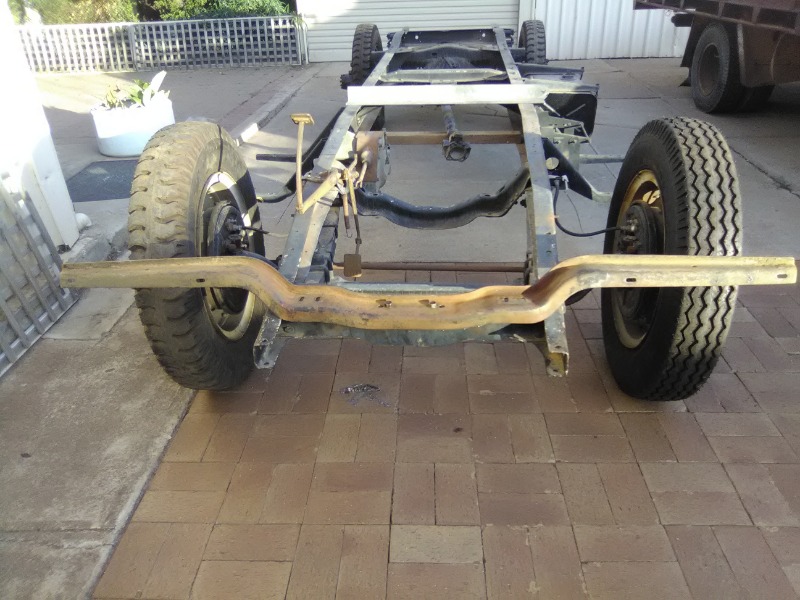
Once these were clamped in position in preparation for a trial fit attention was directed to the rear cab mounting. Again much measuring - repeatedly checking side to side, for and aft, as well as up and down (during which the nose cone and fender support bar was fitted). At length, and with some trepidation, I opted to use the O type cross member, leaving the M type cross member in place to maintain chassis rigidity. The rivets were ground, drilled, and punched out.
To compensate for the higher position of the front mounting points, the lower bracing pieces were left in the O type chassis and the upper section of the cross member placed above, rather than below the top chassis face. The cross member was placed, measured, and marked for drilling, but not fitted as it still needed to be cleaned.
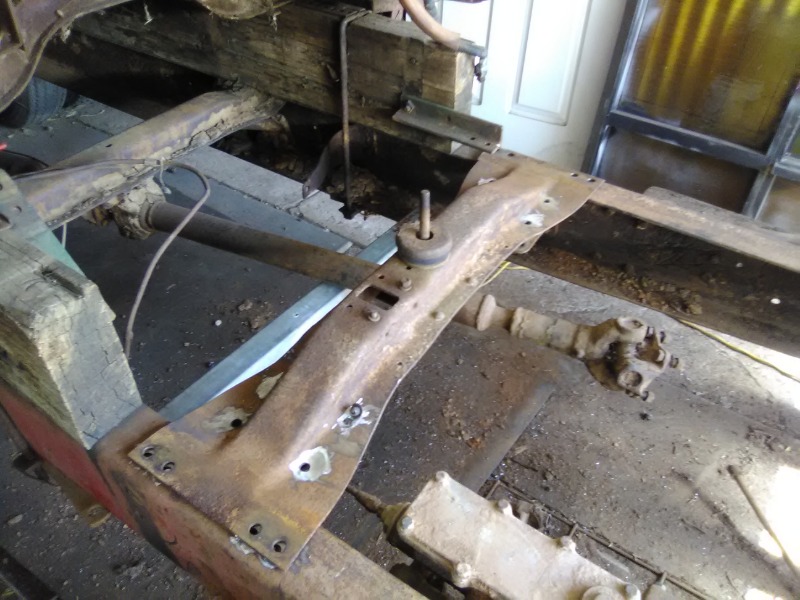
The front end will need to have the guards narrowed, or the wheels offset, to improve the way the front end looks at the moment - but that will no doubt be attended to later.

Eventually the decision was made to use a section of steel plate bolted to the upper chassis rail with a tapped hole for the cab mounting bolt. This would alleviate the need for a nut, which would not clear the chassis side anyway as the side of the hole barely cleared the chassis width.
Once these were clamped in position in preparation for a trial fit attention was directed to the rear cab mounting. Again much measuring - repeatedly checking side to side, for and aft, as well as up and down (during which the nose cone and fender support bar was fitted). At length, and with some trepidation, I opted to use the O type cross member, leaving the M type cross member in place to maintain chassis rigidity. The rivets were ground, drilled, and punched out.
To compensate for the higher position of the front mounting points, the lower bracing pieces were left in the O type chassis and the upper section of the cross member placed above, rather than below the top chassis face. The cross member was placed, measured, and marked for drilling, but not fitted as it still needed to be cleaned.
The front end will need to have the guards narrowed, or the wheels offset, to improve the way the front end looks at the moment - but that will no doubt be attended to later.
Last edit: 4 years 1 month ago by PDU.
Please Log in to join the conversation.
Time to create page: 1.107 seconds