- Posts: 1035
- Thank you received: 543
A was for Austin, but now B is for Bedford
3 years 11 months ago #210490
by wouldyou
Replied by wouldyou on topic A was for Austin, but now B is for Bedford
Hello PDU,
Regarding your post in the other Bedford thread, if your truck had been on a farm the plate could be an anchor point for a small square hay bale loader fixed to the side of truck and elevating bales to around shoulder height above tray.
David.
Regarding your post in the other Bedford thread, if your truck had been on a farm the plate could be an anchor point for a small square hay bale loader fixed to the side of truck and elevating bales to around shoulder height above tray.
David.
Please Log in to join the conversation.
3 years 11 months ago - 3 years 11 months ago #210491
by PDU
Replied by PDU on topic A was for Austin, but now B is for Bedford
wouldyou
The plate is under the cab mounting onto the chassis rail David, in the picture you are referring to the cab is actually laying on it's back face onto the tray, windshield to the sky. :blink:
Kinda hard to mount a hay baler down there . . . but thanks for your interest.
The plate is under the cab mounting onto the chassis rail David, in the picture you are referring to the cab is actually laying on it's back face onto the tray, windshield to the sky. :blink:
Kinda hard to mount a hay baler down there . . . but thanks for your interest.
Last edit: 3 years 11 months ago by PDU.
Please Log in to join the conversation.
3 years 11 months ago - 3 years 11 months ago #210584
by PDU
Replied by PDU on topic A was for Austin, but now B is for Bedford
After confirmation from Michael (of the 214 fuel issues) that his O type cab does not have a stepped mounting, and with closer inspection by Ernie and I, it would appear that B for may well have had a rather nasty shunt at some stage!? 
This might partially explain the now rectified door pillar issues also? :oops: The repair is quite sound, including the plate added below the bent (rather than stepped) mounting - with substantial reinforcements. Although it appeared at first glance to be lower than the left hand mounting, when we checked with a steel metre long rule and depth gauges we discovered it is near as damn it to being spot on. :blink:
So, even if it does look a bit rustic/home grown/rudimentary/crude, it will be staying where it is and receive a simple tidy up appearance wise. :blush: Hopefully when done it will pass muster by the great unwashed outside world . . .
Last edit: 3 years 11 months ago by PDU.
The following user(s) said Thank You: cobbadog
Please Log in to join the conversation.
3 years 10 months ago #210663
by PDU
Replied by PDU on topic A was for Austin, but now B is for Bedford
I am still here :huh: enjoyed a wee break, been for some family time, trekked around the country a bit, but still here. So prepare for some more PDU rambling: ")
A day or so of cleaning the crap from under the cab, but every so often I'd glance back at the driver's side mounting for the cab . . . not happy Jan, not happy at all.
Gotta do something with it, but what?
Maybe I'll remove the thick bit of steel plate from the bottom and see how bad things look behind it? I can always weld it back on, but if I'm going to do that why bother to remove it? No, just forget it and carry on with the other stuff . . .
Yeah, carry on with the wire brush, splash on some Kill Rust, try not to look at that bloody mount, look away. Damn! I looked, blast!
How am I going to extract all that heavy reinforcing? It's so thick and braced where I'll never be able to get into it . . . but, it looks so ugly. :sick:
Bite the bullet buddy! Ernie won't be back with his mig to tidy up those couple of patches until Wednesday, hmm? Maybe?
That's been my world for the last few days, but today I ignored the maybe button and hit the delete button instead, working my way through several layers of what could easily have been reinforcements for the Titanic, removing bent, twisted and cracked metal, only to discover more beneath that!! :ohmy:
I won't show you any pictures yet; but considering this must have been fixed with the cab still on the chassis, the end result was a work of art. Unfortunately there is a distinct difference between classical and abstract art - and I can't stand abstract art!
My task tomorrow (after Men's Shed) is to create a new mounting that will hopefully be an illusion of the original flat mounting . . . bear with me, it will happen.
Please Log in to join the conversation.
3 years 10 months ago #210674
by cobbadog
Cheers Cobba & Cobbarette
Coopernook, The Centre of our Universe
Working on more play time.
Replied by cobbadog on topic A was for Austin, but now B is for Bedford
One step at a time and you will get there.
I have a mountain of one steps to do with the toys around here.
I have a mountain of one steps to do with the toys around here.
Cheers Cobba & Cobbarette
Coopernook, The Centre of our Universe
Working on more play time.
The following user(s) said Thank You: PDU
Please Log in to join the conversation.
3 years 10 months ago - 3 years 10 months ago #210700
by PDU
Replied by PDU on topic A was for Austin, but now B is for Bedford
Now I realise yesterday's comment may have seemed a bit over the top, but this was where I was coming from:
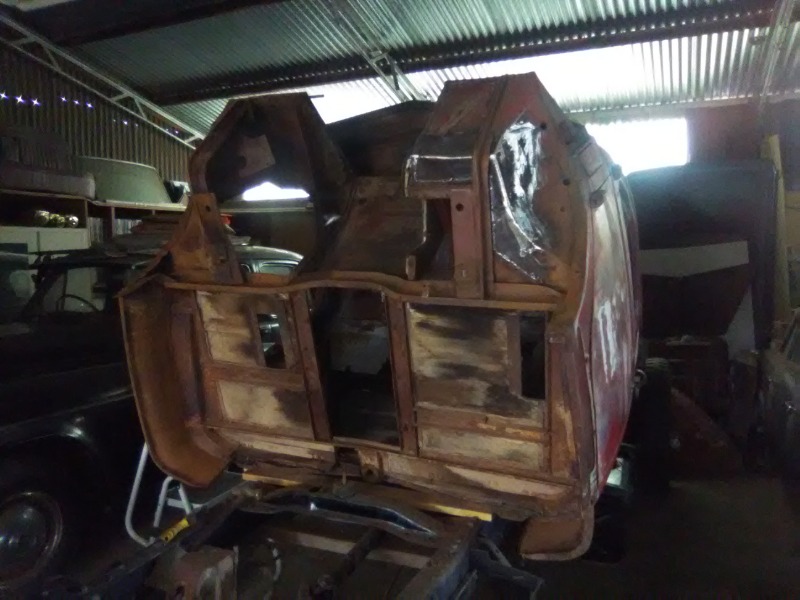
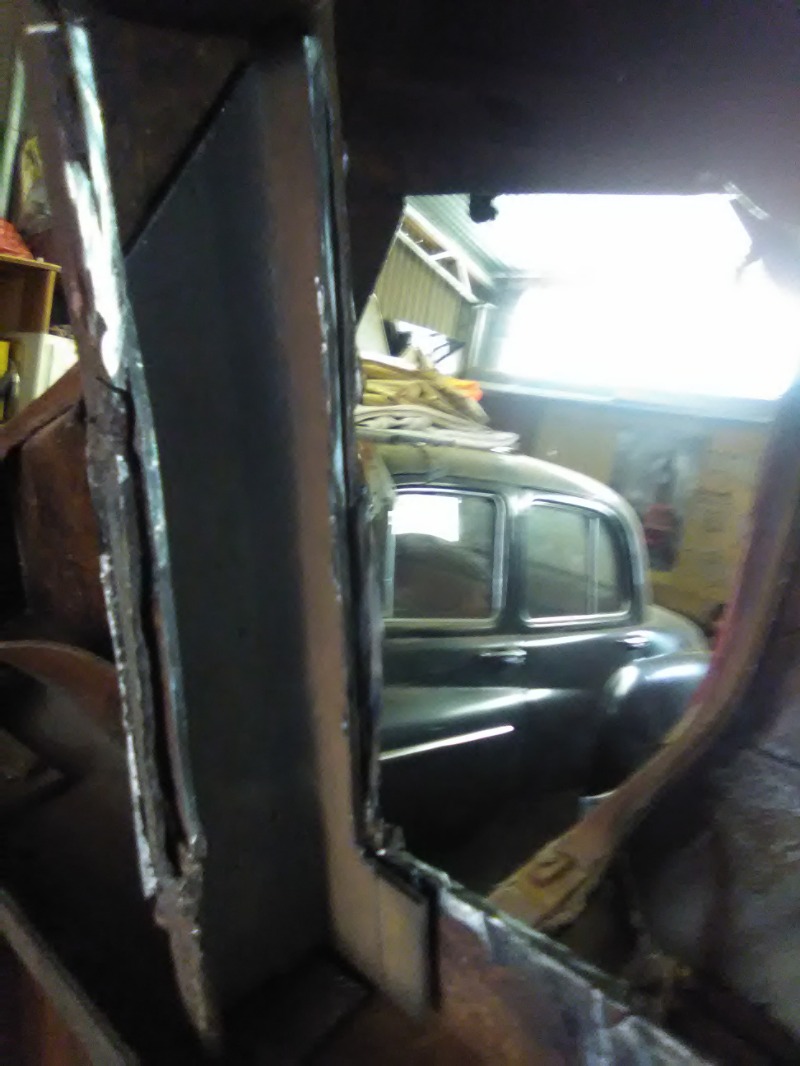
Remember the cab is laying back looking up at the ceiling, and the two cab mountings are towards the top, each with two holes in them. The upper hole does nothing (probably used when the cab was fitted to the chassis in the factory?) and the lower hole is where the rubber mounting pad sits, sandwiched between the cab and the chassis. The passenger's side (RHS in picture) is flat from end to end, while the driver's side has a definite sweeping step shape, which when you see it from inside the cab doesn't look quite so bad, even with its thick coating of surface rust.
But it was when seen from below, and how it had been layered to achieve the correct height where the rubber pad goes, that I couldn't live with . . . even if it did the job it was meant to do!

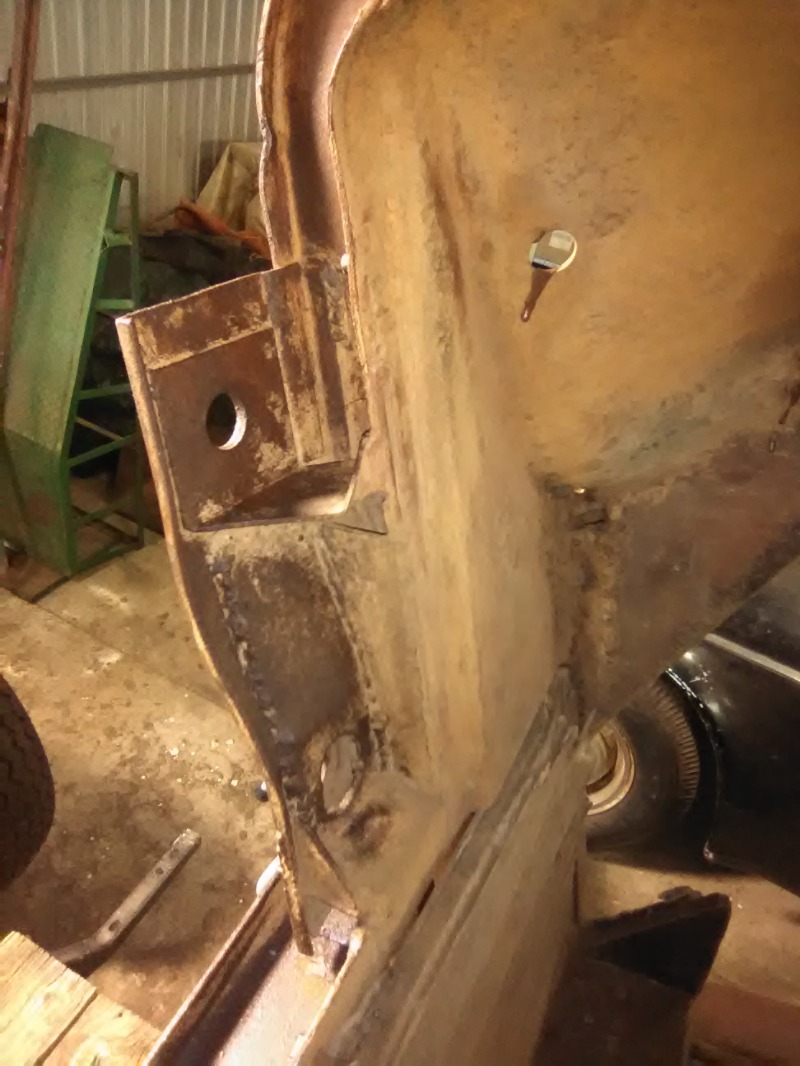
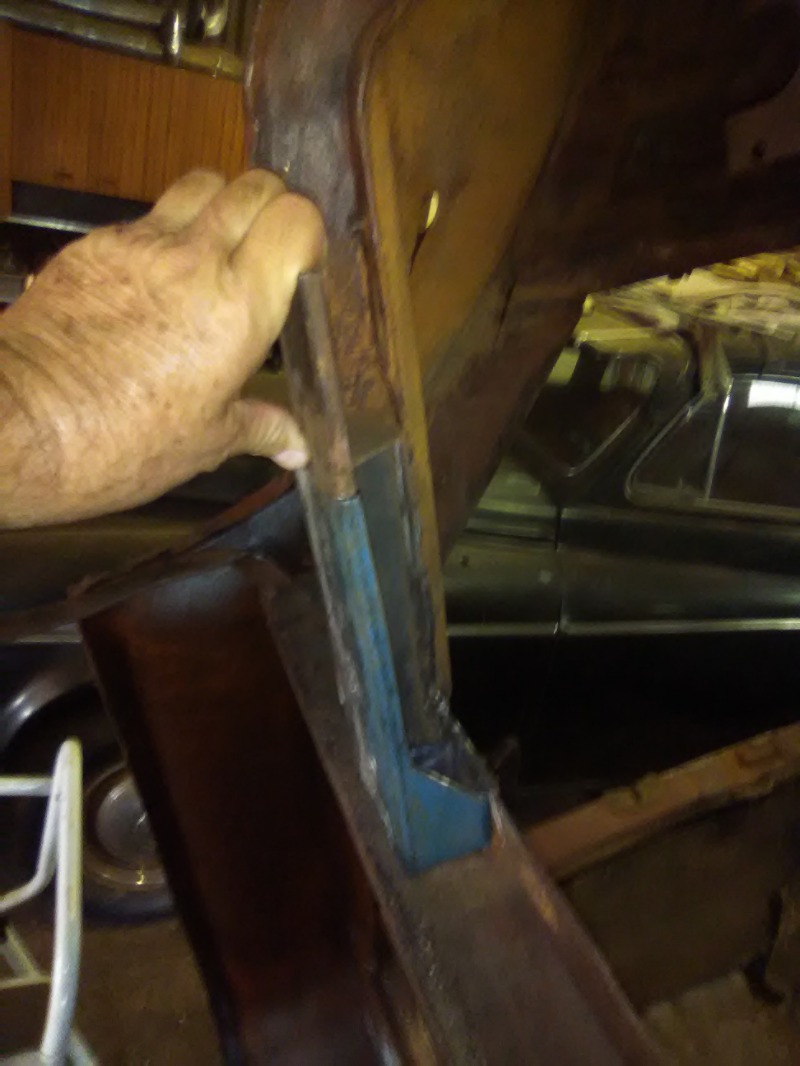
After cutting away the thick plate at the bottom this revealed what was left of the "flat" section:
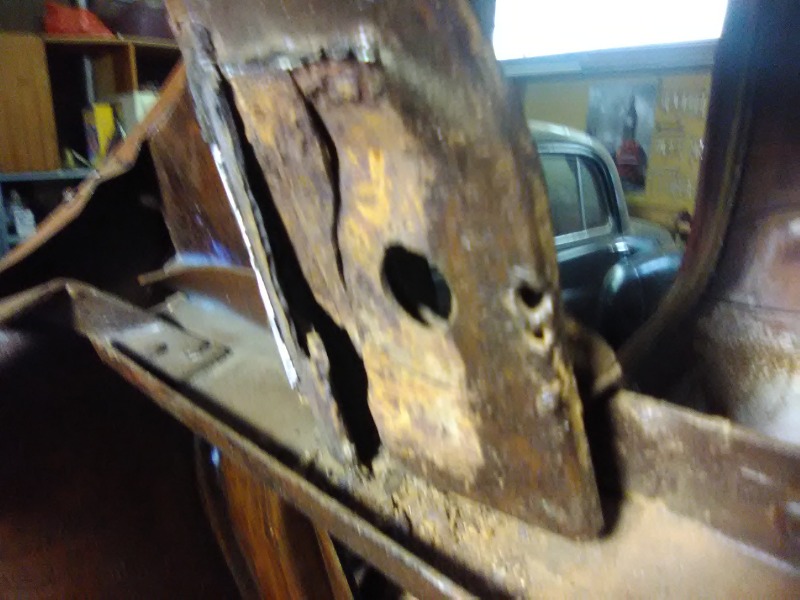
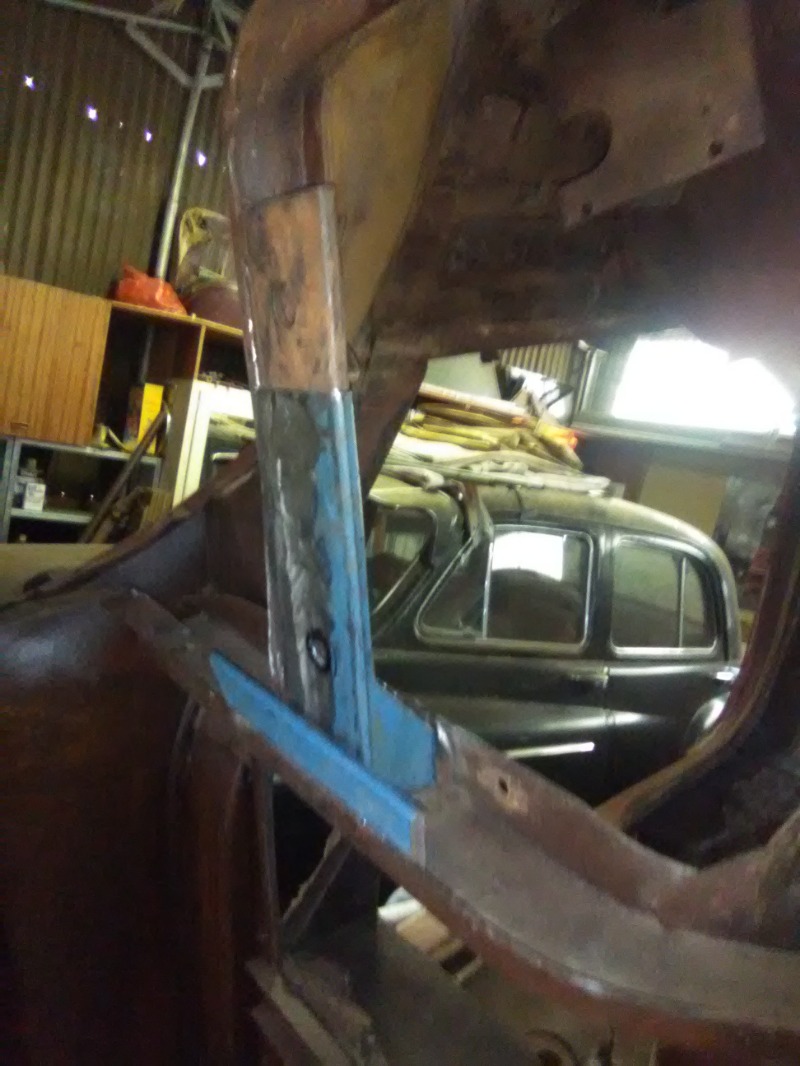
I then removed the bent section, leaving the front piece with web support piece (not original) as a guide.
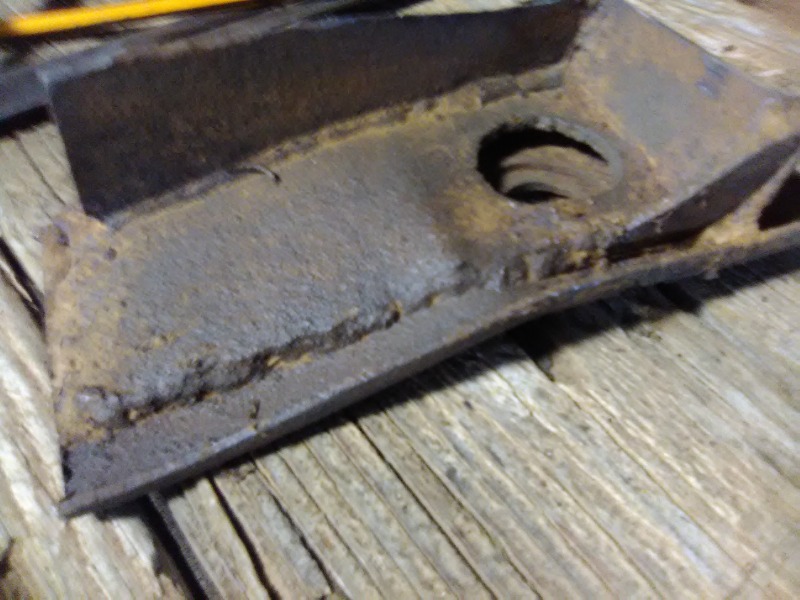
The piece removed, after judicious cutting through the cab floor and two added plates, was a sizeable chunk as you will see following . . .
Remember the cab is laying back looking up at the ceiling, and the two cab mountings are towards the top, each with two holes in them. The upper hole does nothing (probably used when the cab was fitted to the chassis in the factory?) and the lower hole is where the rubber mounting pad sits, sandwiched between the cab and the chassis. The passenger's side (RHS in picture) is flat from end to end, while the driver's side has a definite sweeping step shape, which when you see it from inside the cab doesn't look quite so bad, even with its thick coating of surface rust.
But it was when seen from below, and how it had been layered to achieve the correct height where the rubber pad goes, that I couldn't live with . . . even if it did the job it was meant to do!
After cutting away the thick plate at the bottom this revealed what was left of the "flat" section:
I then removed the bent section, leaving the front piece with web support piece (not original) as a guide.
The piece removed, after judicious cutting through the cab floor and two added plates, was a sizeable chunk as you will see following . . .
Last edit: 3 years 10 months ago by PDU.
The following user(s) said Thank You: cobbadog
Please Log in to join the conversation.
3 years 10 months ago - 3 years 10 months ago #210702
by PDU
With that out of the way any remnants of where it had been welded into the chassis were removed and the rebuild began. I did consider straightening the original (cracked) section for a while, but ultimately decided new metal was far more sensible.

But before that I trimmed some angle iron to fit inside the section alongside the mount as there were two small cracks I wanted to ensure were fully supported (barely 3/8" long and will be welded also as I weld in my new pieces tomorrow).
The replacement piece was made from some 2" square tubing, with three sides partially removed, plus a section of one of the removed sides alongside. This was welded from end to end underneath, and also along the tiny web left on top. It might not sound very clear here, but everything looks sound in the flesh!? :huh: :lol:
Ignore the extra pieces sideways across the width, they are there purely to ensure it is pushed into the right position. The hole for the mounting bolt still has to be opened up, but that can happen later - after everything is welded and cleaned up.
The silly part is that none of this will be visible when the cab goes back down again, :oops: BUT I will be happier knowing that it has been done.
Replied by PDU on topic A was for Austin, but now B is for Bedford
With that out of the way any remnants of where it had been welded into the chassis were removed and the rebuild began. I did consider straightening the original (cracked) section for a while, but ultimately decided new metal was far more sensible.
But before that I trimmed some angle iron to fit inside the section alongside the mount as there were two small cracks I wanted to ensure were fully supported (barely 3/8" long and will be welded also as I weld in my new pieces tomorrow).
The replacement piece was made from some 2" square tubing, with three sides partially removed, plus a section of one of the removed sides alongside. This was welded from end to end underneath, and also along the tiny web left on top. It might not sound very clear here, but everything looks sound in the flesh!? :huh: :lol:
Ignore the extra pieces sideways across the width, they are there purely to ensure it is pushed into the right position. The hole for the mounting bolt still has to be opened up, but that can happen later - after everything is welded and cleaned up.
The silly part is that none of this will be visible when the cab goes back down again, :oops: BUT I will be happier knowing that it has been done.
Last edit: 3 years 10 months ago by PDU.
Please Log in to join the conversation.
Less
More
- Posts: 6820
- Thank you received: 4705
3 years 10 months ago #210716
by Mrsmackpaul
Your better to die trying than live on your knees begging
Replied by Mrsmackpaul on topic A was for Austin, but now B is for Bedford
Well as long as it all makes sense to you thats all that really matters
Im just happy to watch along with the journey and offer pointless advice (dribble) as we go :silly: :silly: :silly: :silly:
Seriously, it looks really good to me
Paul
Im just happy to watch along with the journey and offer pointless advice (dribble) as we go :silly: :silly: :silly: :silly:
Seriously, it looks really good to me
Paul
Your better to die trying than live on your knees begging
The following user(s) said Thank You: PDU
Please Log in to join the conversation.
3 years 10 months ago #210737
by husky
Replied by husky on topic A was for Austin, but now B is for Bedford
hi PDU ,agree with mrsmackpaul ,your doing a fine job and it has been brilliant to follow the build so far and look forward to seeing the completed project ,we,re all behind you and keep posting its ongoing development with pictures.
Husky
Husky
The following user(s) said Thank You: PDU
Please Log in to join the conversation.
3 years 10 months ago #210748
by cobbadog
Cheers Cobba & Cobbarette
Coopernook, The Centre of our Universe
Working on more play time.
Replied by cobbadog on topic A was for Austin, but now B is for Bedford
So this is now the new 'light weight model'
At least now you are happy with the decision that you have repaired it properly and even though it won't be seen, it will be known!
Great work as usual. Glad to see you are making progress, I'm still waiting on parts.
At least now you are happy with the decision that you have repaired it properly and even though it won't be seen, it will be known!
Great work as usual. Glad to see you are making progress, I'm still waiting on parts.
Cheers Cobba & Cobbarette
Coopernook, The Centre of our Universe
Working on more play time.
The following user(s) said Thank You: PDU
Please Log in to join the conversation.
Time to create page: 0.643 seconds