- Posts: 1771
- Thank you received: 872
A was for Austin, but now B is for Bedford
4 years 3 weeks ago #207983
by overnite
Same company.
Replied by overnite on topic A was for Austin, but now B is for Bedford
allan wrote: I saw one of those in a showroom in Melbourne in early '60s (I was walking past, I didn't go in!)
Lightburn. Didn't they make concrete mixers or something?
Same company.
Please Log in to join the conversation.
4 years 3 weeks ago #207984
by cobbadog
Cheers Cobba & Cobbarette
Coopernook, The Centre of our Universe
Working on more play time.
Replied by cobbadog on topic A was for Austin, but now B is for Bedford
In the middle of last night I had yet another thoughty about mounting the body steel on steel. Maybe the steel used today is somewhat higher grade than what was used way back when and that the older chassis may not stand up to having steel on steel and as has been mentioned a thinner strip of timber would be more economical and easier to work with, lessen the GVM and will work. Study the rules for your rego requirements to see if there is a minimum thickness or contact a vehicle body builder for his opinion.
Cheers Cobba & Cobbarette
Coopernook, The Centre of our Universe
Working on more play time.
Please Log in to join the conversation.
4 years 3 weeks ago - 4 years 3 weeks ago #207985
by PDU
Replied by PDU on topic A was for Austin, but now B is for Bedford
Okay guys, enough with the alphabet, please, you've got my head spinning . . . I cannae afford to go beyond the A and B bit, with plenty of side projects already as you can see! :blink: :side: :silly: :pinch: At least Sarge and cobbadog are still on track (please don't be offended the rest of you ") ).
).
Sarge, you said, "tool boxes like everyone does, hanging from under the tray and bolted to the chassis" - If they hang from the tray and are then bolted to the chassis, doesn't this create a rigid to (minutely) flexible mounting? One fighting the other?
I wondered whether the framework hanging from the tray LH and RH sides could be connected under the chassis rails, but without touching the chassis, thus bracing one side against the other (in possibly three or four places). Picture below is the sort of thing I have in mind but without the tank for liquids . . .
 But, this is getting too far ahead, I've got plenty to do before then, it's just a picture I bought years ago and I have hanging next to my desk causing my mind to meander ahead while relaxing in the evenings. :whistle:
Tomorrow I'll get back to what I have been doing again.")
).Sarge, you said, "tool boxes like everyone does, hanging from under the tray and bolted to the chassis" - If they hang from the tray and are then bolted to the chassis, doesn't this create a rigid to (minutely) flexible mounting? One fighting the other?
I wondered whether the framework hanging from the tray LH and RH sides could be connected under the chassis rails, but without touching the chassis, thus bracing one side against the other (in possibly three or four places). Picture below is the sort of thing I have in mind but without the tank for liquids . . .
Tomorrow I'll get back to what I have been doing again.
Last edit: 4 years 3 weeks ago by PDU.
Please Log in to join the conversation.
4 years 3 weeks ago #207994
by JOHN.K.
Replied by JOHN.K. on topic A was for Austin, but now B is for Bedford
I ve always suspended toolboxes from a couple of tray crossmembers .....if the box is big and heavy ,use a couple of 30x6 thick strips all around and and secured to crossmembers ...never had one fall off .yet.....Best to make the lid swing up ,that way ,it will close if you forget it....The one on the Leyland opened down ,never ripped it off ,but come close .....One time ,I was going out of the yard ,the guy next door had a big grin and waved to me .....knew straight away something was wrong,and sure enough the toolbox had the lid down ...would have smashed it on the gate.
Please Log in to join the conversation.
4 years 3 weeks ago - 4 years 3 weeks ago #207998
by PDU
Replied by PDU on topic A was for Austin, but now B is for Bedford
It makes sense John.K., tank either side and underslung compartments; but as promised, what I have been doing . . .
With the threats of locking down the over 70's I decided to head out (last Saturday) to grab the J Series engine. Everything was ready but obviously having been done by a wrecker, not a rebuilder!? The cab and front guards had been gas axed free of the frame (windscreen smashed), the tipper had been lifted to improve access and some metal placed to keep it out of the way, any attached pieces were hit with the torch again, and then the 4th bolt inside the bellhousing (to free the gearbox) had been cut through with a saw! Don't ask me how/why, I have no idea, and don't particularly care - but glad I removed the radiator. :blink: The petrol tank was laying alongside waiting for me to pick up also. End result, into my trailer and leisurely drive home.")
The following day the engine was transferred to the O type chassis as a convenient place to free it up and to allow me to drop the sump later. The front engine mount bolts were wider apart than the O type, so a piece of wood was drilled and placed onto the chassis under the mount. The rear mounts appear to be angled slightly but I'll check this when it matters.
When the plugs were taken out, 4,5,and 6 were showing signs of water but there was none showing on the dipstick. The engine would not turn, so a liberal amount of degreaser was sprayed into each cylinder - purely because it was sitting nearby from where I had cleaned half an inch of crud from the bellhousing. I left this for about an hour while I cleaned off the sump and lower block area.
As there is no hexagonal fitting on the crankshaft I resorted to a tyre lever across the crank handle slots, successfully :woohoo:, with some effort, but not a great deal thankfully. Satisfied with having turned it about ten degrees it received another dose of degreaser and left to soak overnight.
And so to Monday, engine now turned much easier and I couldn't resist dragging out the abortion of wiring that had been last used on the O type truck when used on the farm, complete with exposed sections and a rusted solid starter solenoid. When shorted out with a screwdriver the engine spun freely and rapidly, but the sump needed to be dropped to ensure no crud was lurking there.
Sump was removed; easy with all the clearance under there, and the sump gasket looked almost as-new(!?), probably because of the flat head screwdriver screws that held it had prevented it from being over tightened. Doesn't everyone enjoy cleaning sumps out? No! But minimal crud and no water.
With the sump off, and plugs back in, the engine was turned over again - making wonderful woofing sounds from compression. Next time I mention this engine it will be to show it running, no doubt.

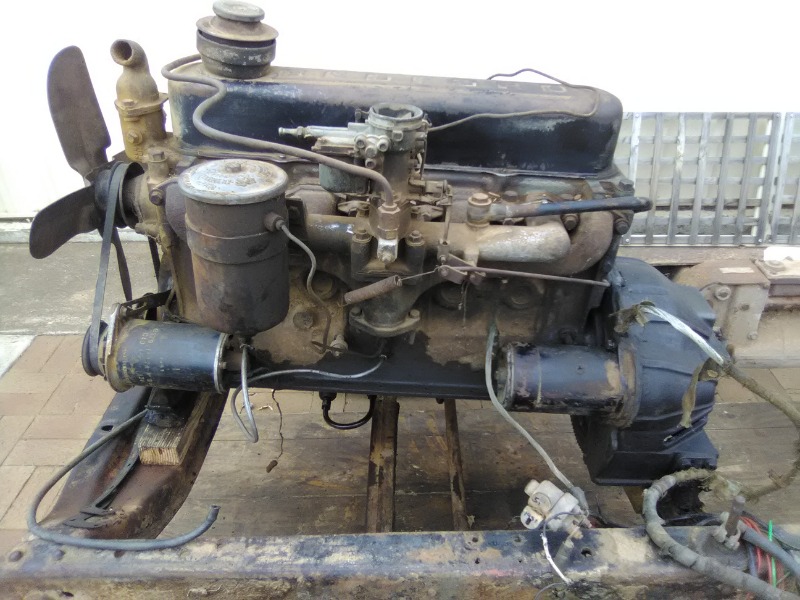
You gotta love that wiring!? :lol:
Meanwhile inside the shed I had revisited the cab mountings, which I want to finalise before starting on the front axle. This will be tomorrows offering.
With the threats of locking down the over 70's I decided to head out (last Saturday) to grab the J Series engine. Everything was ready but obviously having been done by a wrecker, not a rebuilder!? The cab and front guards had been gas axed free of the frame (windscreen smashed), the tipper had been lifted to improve access and some metal placed to keep it out of the way, any attached pieces were hit with the torch again, and then the 4th bolt inside the bellhousing (to free the gearbox) had been cut through with a saw! Don't ask me how/why, I have no idea, and don't particularly care - but glad I removed the radiator. :blink: The petrol tank was laying alongside waiting for me to pick up also. End result, into my trailer and leisurely drive home.
The following day the engine was transferred to the O type chassis as a convenient place to free it up and to allow me to drop the sump later. The front engine mount bolts were wider apart than the O type, so a piece of wood was drilled and placed onto the chassis under the mount. The rear mounts appear to be angled slightly but I'll check this when it matters.
When the plugs were taken out, 4,5,and 6 were showing signs of water
but there was none showing on the dipstick. The engine would not turn, so a liberal amount of degreaser was sprayed into each cylinder - purely because it was sitting nearby from where I had cleaned half an inch of crud from the bellhousing. I left this for about an hour while I cleaned off the sump and lower block area.As there is no hexagonal fitting on the crankshaft I resorted to a tyre lever across the crank handle slots, successfully :woohoo:, with some effort, but not a great deal thankfully. Satisfied with having turned it about ten degrees it received another dose of degreaser and left to soak overnight.
And so to Monday, engine now turned much easier and I couldn't resist dragging out the abortion of wiring that had been last used on the O type truck when used on the farm, complete with exposed sections and a rusted solid starter solenoid. When shorted out with a screwdriver the engine spun freely and rapidly, but the sump needed to be dropped to ensure no crud was lurking there.
Sump was removed; easy with all the clearance under there, and the sump gasket looked almost as-new(!?), probably because of the flat head screwdriver screws that held it had prevented it from being over tightened. Doesn't everyone enjoy cleaning sumps out? No! But minimal crud and no water.
With the sump off, and plugs back in, the engine was turned over again - making wonderful woofing sounds from compression. Next time I mention this engine it will be to show it running, no doubt.
You gotta love that wiring!? :lol:
Meanwhile inside the shed I had revisited the cab mountings, which I want to finalise before starting on the front axle. This will be tomorrows offering.
Last edit: 4 years 3 weeks ago by PDU.
Please Log in to join the conversation.
4 years 3 weeks ago #207999
by Swishy
OF ALL THE THINGS EYE MISS ................. EYE MISS MY MIND THE MOST
There's more WORTH in KENWORTH
Replied by Swishy on topic A was for Austin, but now B is for Bedford
BigDownUnder
gudday m8
gr8 info n pix
U wanna hit nuther button on u're phone/camera
so we can getsum move n pix of wen the beast cums alive
LOL
cya
gudday m8
gr8 info n pix
U wanna hit nuther button on u're phone/camera
so we can getsum move n pix of wen the beast cums alive
LOL
cya
OF ALL THE THINGS EYE MISS ................. EYE MISS MY MIND THE MOST
There's more WORTH in KENWORTH
Please Log in to join the conversation.
4 years 3 weeks ago - 4 years 3 weeks ago #208011
by PDU
Replied by PDU on topic A was for Austin, but now B is for Bedford
Every intention of doing so Swishy, we can all hear it cough and splutter - when I get to it.
Today (hoooeeee, we're on real time now!) was all about the front cab mountings. My idea, up until about a week ago, was to use a stud similar to the original mountings. Not finding any readily available I considered alternatives, deciding to use a high tensile bolt (with nyloc nut) through a raised platform, giving me a little more flexibility during the set-up phase. All I needed was the raised platform which would sit on my previously made plates.
After much scrounging through my assortment of selected flotsam and jetsom with no luck I spotted the tail-light bracket from the O type chassis.

A little reworking and I had what I wanted, they were slipped into place and although they would have worked I wanted something beefier. (NOT a burger! )
)
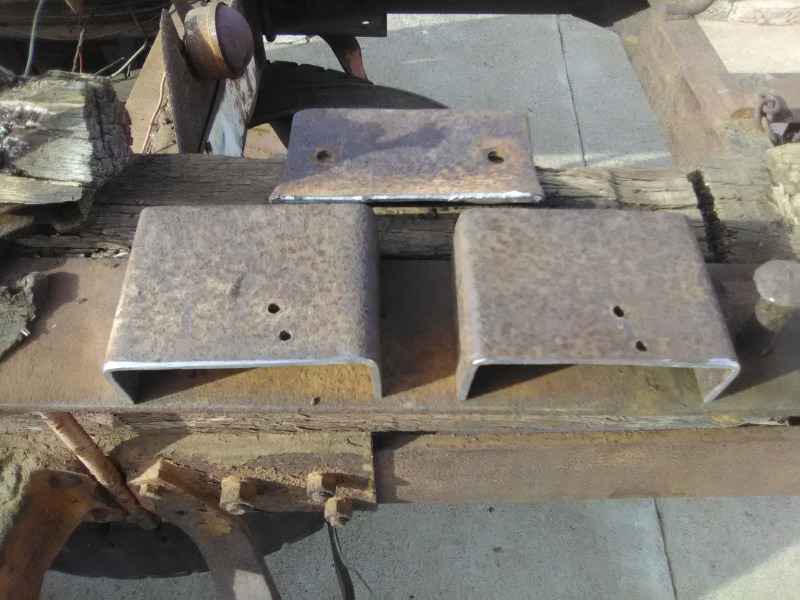
The answer was a section of channel iron, the sides were cut down, welded to bottom plate, . . .

. . . painted, and bolted in place.
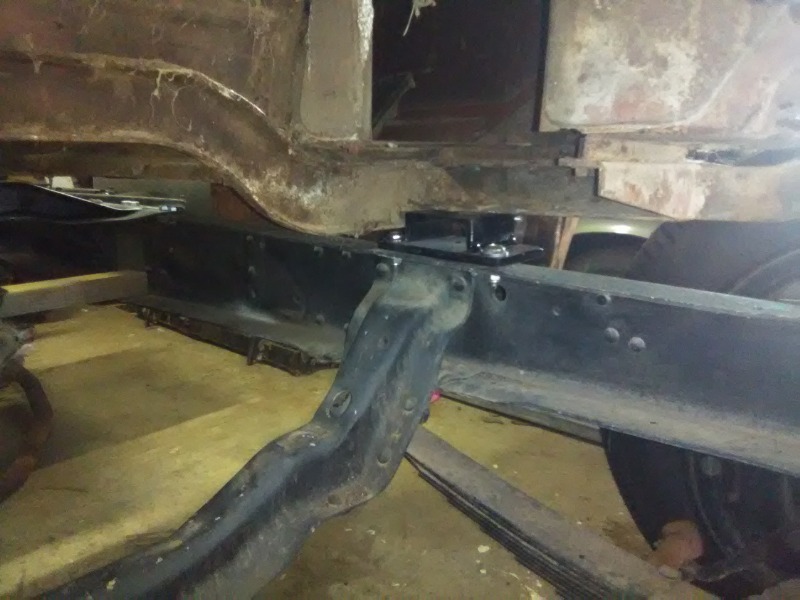
No rubber at this point, and no bolt either, because I haven't drilled a hole for them yet. This can be done when I lift the body off to work on it, much later.
Perhaps tomorrow I'll get back onto the engine, or maybe bite the bullet and start on the axle . . .

Today (hoooeeee, we're on real time now!) was all about the front cab mountings. My idea, up until about a week ago, was to use a stud similar to the original mountings. Not finding any readily available I considered alternatives, deciding to use a high tensile bolt (with nyloc nut) through a raised platform, giving me a little more flexibility during the set-up phase. All I needed was the raised platform which would sit on my previously made plates.
After much scrounging through my assortment of selected flotsam and jetsom with no luck I spotted the tail-light bracket from the O type chassis.
A little reworking and I had what I wanted, they were slipped into place and although they would have worked I wanted something beefier. (NOT a burger!
)The answer was a section of channel iron, the sides were cut down, welded to bottom plate, . . .
. . . painted, and bolted in place.
No rubber at this point, and no bolt either, because I haven't drilled a hole for them yet.
This can be done when I lift the body off to work on it, much later.Perhaps tomorrow I'll get back onto the engine, or maybe bite the bullet and start on the axle . . .
Last edit: 4 years 3 weeks ago by PDU.
Please Log in to join the conversation.
4 years 3 weeks ago #208021
by cobbadog
Cheers Cobba & Cobbarette
Coopernook, The Centre of our Universe
Working on more play time.
Replied by cobbadog on topic A was for Austin, but now B is for Bedford
Nice work on the new brackets. I know nyloc nuts are great bit castellated ones can be better if you can get to the nut to fit the split pin.
Cheers Cobba & Cobbarette
Coopernook, The Centre of our Universe
Working on more play time.
Please Log in to join the conversation.
4 years 3 weeks ago - 4 years 3 weeks ago #208027
by PDU
Replied by PDU on topic A was for Austin, but now B is for Bedford
Too fiddly pulling split pins out cobbadog, and how would I drill the high tensile bolts? No, nylocs are the way to go - modern convenience. Thanks for the compliment about the brackets, I was pleasantly satisfied how they turned out, although a tad over engineered maybe but built with ease of access if needs be (not a trait with todays cars!).
How goes the second flywheel, seems you've been quiet on that for a while now . . . ?
Thanks for the compliment about the brackets, I was pleasantly satisfied how they turned out, although a tad over engineered maybe but built with ease of access if needs be (not a trait with todays cars!).How goes the second flywheel, seems you've been quiet on that for a while now . . . ?
Last edit: 4 years 3 weeks ago by PDU.
The following user(s) said Thank You: cobbadog
Please Log in to join the conversation.
4 years 3 weeks ago - 4 years 3 weeks ago #208050
by PDU
Replied by PDU on topic A was for Austin, but now B is for Bedford
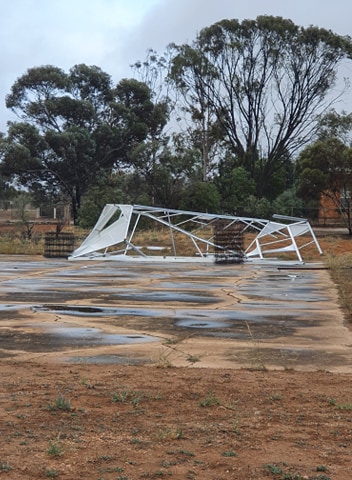
Well, today has been a wee bit trying, I had put sufficient support under the chassis to undo the front axle and was happily beavering away undoing the u-bolts (bloody tight buggers) when the lights went out in my garage . . . apparently a power outage which remained off for about five hours! 
This was closely followed by a dust storm, a BIG dust storm, with very strong wind. and then rain. The things the government do to keep us locked down at home folks busy, it's unbelievable.
End result: I had to stop because I couldn't see what I was doing. The fourth u-bolt tomorrow I hope . . .
Meanwhile this is what happened to a shade house at our Men's Shed Community garden. :oops:
Last edit: 4 years 3 weeks ago by PDU.
Please Log in to join the conversation.
Time to create page: 1.069 seconds