- Posts: 407
- Thank you received: 402
1965 F250’s Rejuvenation
2 years 3 months ago #230077
by Urchy87
Adventure before Dementia.
Replied by Urchy87 on topic 1965 F250’s Rejuvenation
Cheers JOHN.K
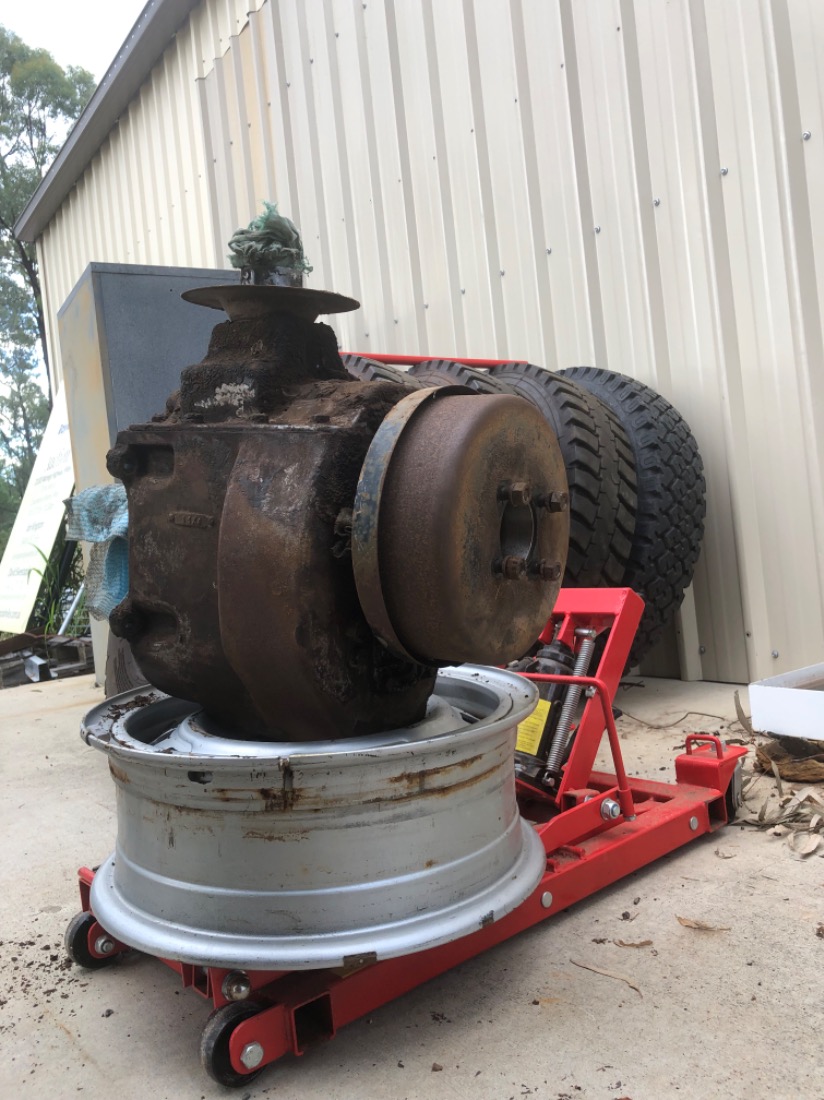
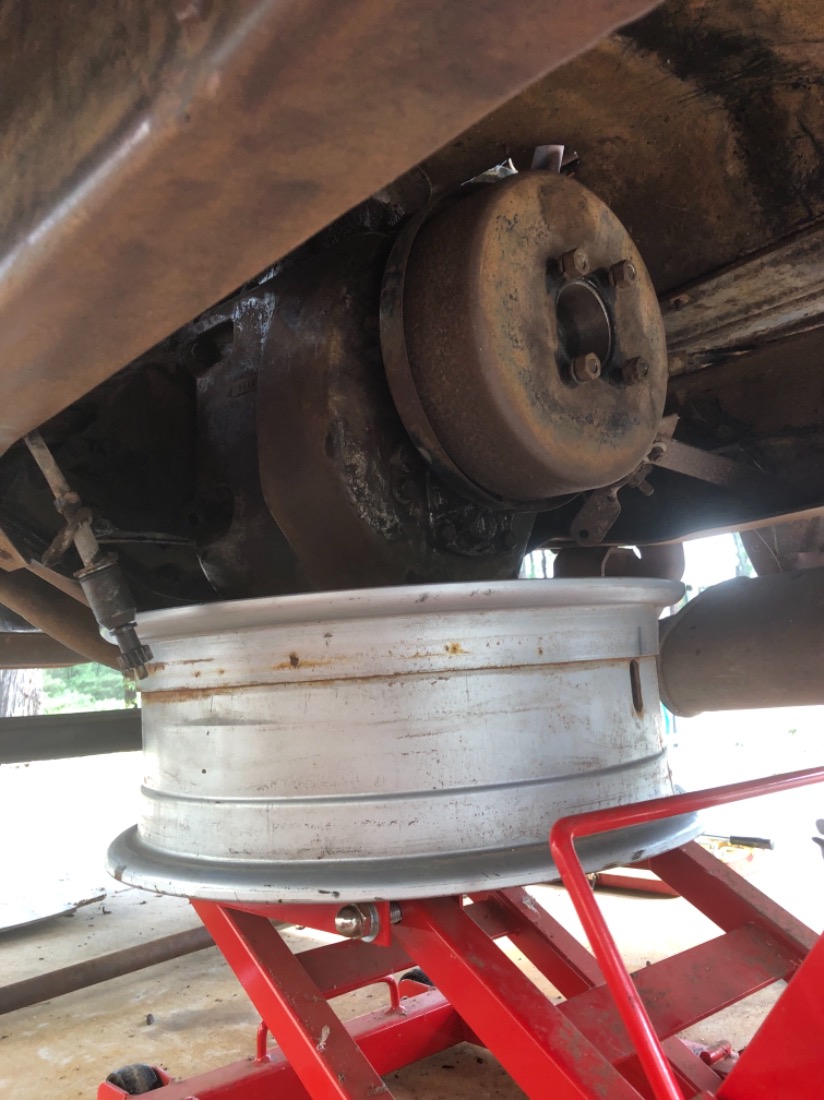
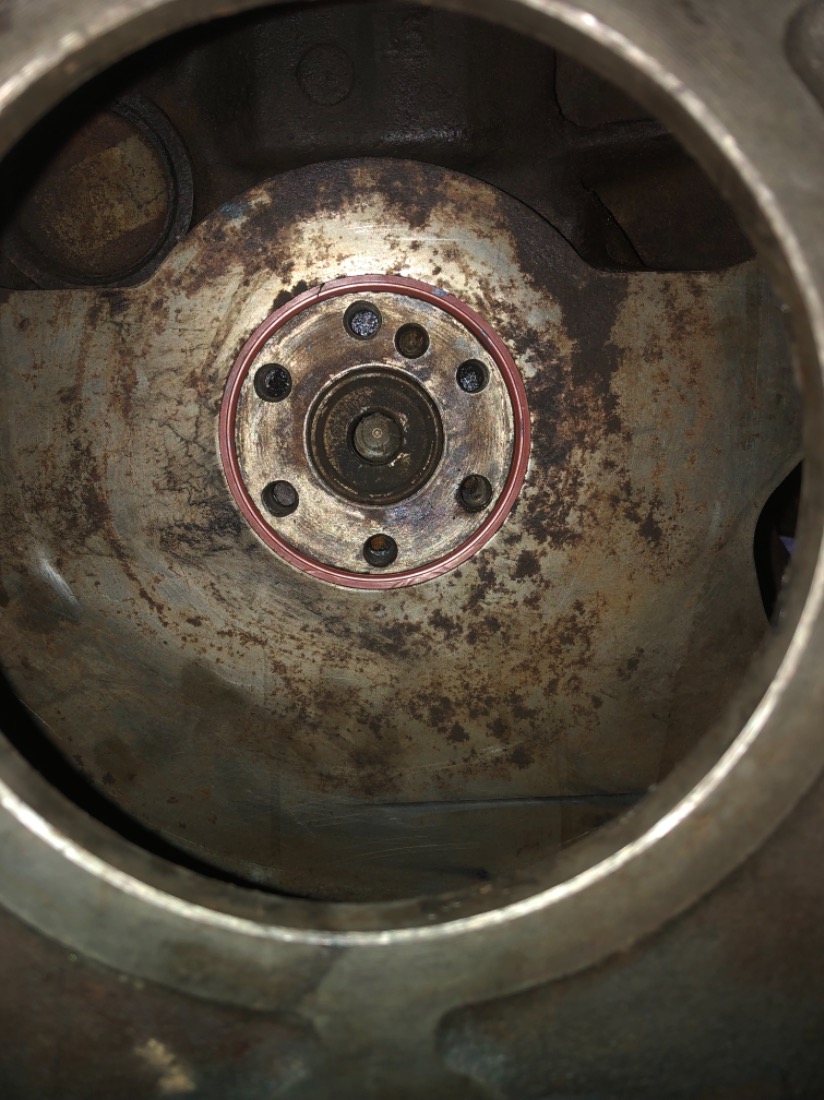
Over the last few afternoons I’ve been tackling the rear main seal. It’s been good to move along with something. Having the rear engine mounts incorporated into the bell housing gave its challenges. I jerry rigged a motorbike jack and steel rim together to drop the gearbox out and then with some besser bricks to support the engine for removing the bell housing. The old seal came out easily enough along with the new one going in. The old seal still seemed ok. It was pliable and looked to have no damage. Anyway, it leaked terribly and is replaced now. It got dark so mounted the bell housing as quick as I could and rested it on the crossmember. Looks like it shifted a bit so that will be enjoyable to line up with the mounts.

Over the last few afternoons I’ve been tackling the rear main seal. It’s been good to move along with something. Having the rear engine mounts incorporated into the bell housing gave its challenges. I jerry rigged a motorbike jack and steel rim together to drop the gearbox out and then with some besser bricks to support the engine for removing the bell housing. The old seal came out easily enough along with the new one going in. The old seal still seemed ok. It was pliable and looked to have no damage. Anyway, it leaked terribly and is replaced now. It got dark so mounted the bell housing as quick as I could and rested it on the crossmember. Looks like it shifted a bit so that will be enjoyable to line up with the mounts.
Adventure before Dementia.
Please Log in to join the conversation.
2 years 3 months ago #230086
by Morris
I have my shoulder to the wheel,
my nose to the grindstone,
I've put my best foot forward,
I've put my back into it,
I'm gritting my teeth,
Now I find I can't do any work in this position!
Replied by Morris on topic 1965 F250’s Rejuvenation
Urchy87 You have done very well getting that box out and back in by yourself. My Mate spent half an hour making a cradle to fit on a trolley jack and then with him under the small Inter, smaller than an F250, and me working the jack, we spent a long time getting the gearbox lined up!
I have my shoulder to the wheel,
my nose to the grindstone,
I've put my best foot forward,
I've put my back into it,
I'm gritting my teeth,
Now I find I can't do any work in this position!
The following user(s) said Thank You: Urchy87
Please Log in to join the conversation.
2 years 3 months ago #230087
by PDU
Replied by PDU on topic 1965 F250’s Rejuvenation
On those sort of jobs I generally end up persisting, and getting nowhere, until I stop for a cup of tea. When you go back it all slides together as though to say, "What were you making so much fuss about?"
10/10 Urchy87 for doing it by yourself . . . just another one man army.")
10/10 Urchy87 for doing it by yourself . . . just another one man army.
Please Log in to join the conversation.
2 years 3 months ago - 2 years 3 months ago #230091
by JOHN.K.
Replied by JOHN.K. on topic 1965 F250’s Rejuvenation
Back in the day,we wernt allowed to use a trolley on the 4 speed boxes.........put the gearstick in gear ,grab the stick with both hands ,and reef the box out of the housing,and lower it down to the ground.........replace the clutch plate /pressure plate ,and reverse the process....
Last edit: 2 years 3 months ago by JOHN.K..
Please Log in to join the conversation.
Less
More
- Posts: 6816
- Thank you received: 4696
2 years 3 months ago #230097
by Mrsmackpaul
Your better to die trying than live on your knees begging
Replied by Mrsmackpaul on topic 1965 F250’s Rejuvenation
Most (every time for me) a rear main is leaking I find the seal looks perfect when I pull it out, yet it seams to seal up oil tight when I put a new seal i n
I also put a speedy sleave on when putting a new rear main seal just as a matter of course because they are always such a big job to get to
As far as lining things up again, I get a few of the longest bolts I cam find that matches the bell housing bolts and cut the heads off and screw these in
It is mazing how much this helps to keep tjings aligned and adds extra stability and safety to what I'm doing
I also do this when I split a tractor, a few ratchet straps and a tape measure and I can get the largest tractors I own apart and back together on my own, itdoes take me all day but nice and steady though
Paul
Your better to die trying than live on your knees begging
Please Log in to join the conversation.
2 years 3 months ago #230102
by wee-allis
Replied by wee-allis on topic 1965 F250’s Rejuvenation
Paul, as far as using cut off bolts to line things up, I do the same with head bolts on an engine, especially when replacing a heavy head on my own. Cut the heads off, cut a screwdriver slot in the shank to unscrew them after, even using a magnet to pull them out if a bit short. Guarantees the gasket stay in place at the same time.
Please Log in to join the conversation.
2 years 3 months ago #230103
by cobbadog
Cheers Cobba & Cobbarette
Coopernook, The Centre of our Universe
Working on more play time.
Replied by cobbadog on topic 1965 F250’s Rejuvenation
Well done on the seal replacement and clever thinking using that bike jack, well done. When I did the engine rebuild in the David Brown the workshop manual stated to do just that, use 4 long studs and use it as a guide to line up the cylinder block to the frame as the frame is the bottom half of the engine. The big issue was the front and rear felt seals. From new these are a little longer than the area they fit into. Manual clearly staes DO NOT CUT. Lift the block up and onto the guides then lower it to being about 2" above the frame then drop the b lock the rest of the way. Followed instructions to the letter and when I went around with my torch both felts were sitting exactly in place and the very thin side gaskets were also in tact. Perfect repair and advise. I would never of thought of doing it that way although I did think of using the studs as a guide.
Cheers Cobba & Cobbarette
Coopernook, The Centre of our Universe
Working on more play time.
Please Log in to join the conversation.
2 years 3 months ago #230105
by mammoth
Replied by mammoth on topic 1965 F250’s Rejuvenation
Love the bike jack idea. Please don't use any besser blocks or bricks to support weight. A falling engine probably won't kill you but it is a habit that might bite you further down the track. Also best not to have steel on steel, so have a supply of wood blocks on hand and maybe some pieces of conveyor belt. Great to see you moving on from the terrible setback.
Please Log in to join the conversation.
2 years 3 months ago #230111
by Zuffen
Replied by Zuffen on topic 1965 F250’s Rejuvenation
I use the bolts minus heads and the screwdriver slot but I also have a taper ground on the end of the studs to assist getting the transmission started along the studs.
Please Log in to join the conversation.
2 years 3 months ago #230118
by Urchy87
Adventure before Dementia.
Replied by Urchy87 on topic 1965 F250’s Rejuvenation
Thanks everyone and some great advice in there for us all.
Morris, I can’t quite claim the victory of getting it back in on my own……….YET. But I will as I don’t have much of a choice. I generally run the loan wolf method. Once in I’ll report back on how it went.
I’ll be sure to use the trimmed bolt method, absolutely makes sense, thanks for sharing. It’s a tight fit without removing the tunnel panel, may have to remove it to get the box back in easier.
Clutch, flywheel etc all seem in good condition. This will all come out again when the 351 goes in and new parts installed on wearing items. It’s a 350hp setup so I’m not interested in taking chances otherwise it will all be back out again. Although I like struggling, I’ll pass on that.
mammoth, you are absolutely right on the besser bricks, I shouldn’t have used them. All of my cribbing was too large to fit in there and the wood saw was up at the house. Setup the circular saw to find you can’t just slide the guard back on it, only moves with downward motion. Grrrr. I was just committed at that point, silly. I certainly stayed clear from all potential falling objects.
Adventure before Dementia.
Please Log in to join the conversation.
Time to create page: 0.686 seconds