- Posts: 3882
- Thank you received: 3026
McDonald Imperial Super-Diesel
3 years 7 months ago #214880
by cobbadog
Cheers Cobba & Cobbarette
Coopernook, The Centre of our Universe
Working on more play time.
Replied by cobbadog on topic McDonald Imperial Super-Diesel
I've read the instruction book so many times trying to figure how certain things are suppose to operate, then how they poorly describe how to make it operate and some critical settings are listed but not all. Fortunatley there are people out there who have been down this road and have been a great help so far and no doubt I will be drawing on their information for more details soon.
What I have done so far are just the basics and the real tests are yet to come, setting the push rod and tappet clearances, not a straight forward exercise when you see what it looks like and how it works, then there is that injector and the seating of the needle and tension of the spring. I have guessed the amount of packing on the conrod as these can be added or removed for different compression ratios. I still have the list of possible stuff ups too as a reference of a no start and run situation.
What I have done so far are just the basics and the real tests are yet to come, setting the push rod and tappet clearances, not a straight forward exercise when you see what it looks like and how it works, then there is that injector and the seating of the needle and tension of the spring. I have guessed the amount of packing on the conrod as these can be added or removed for different compression ratios. I still have the list of possible stuff ups too as a reference of a no start and run situation.
Cheers Cobba & Cobbarette
Coopernook, The Centre of our Universe
Working on more play time.
Please Log in to join the conversation.
3 years 7 months ago #214882
by PDU
Replied by PDU on topic McDonald Imperial Super-Diesel
When you glance back through your posts it is impressive how far things have come, you know you're into the home stretch now. More power to you. ")
The following user(s) said Thank You: cobbadog
Please Log in to join the conversation.
3 years 7 months ago #214905
by cobbadog
Cheers Cobba & Cobbarette
Coopernook, The Centre of our Universe
Working on more play time.
Replied by cobbadog on topic McDonald Imperial Super-Diesel
I am not too sure if it is the light at the end of the tunnel or a train coming!
Having said that, I did notice a bad mistake I have made and that is I fitted the speedi-sleeve onto the crankshaft and I have not fitted the drive gear for the cam and oil pump. I think I will have to remove the sleeve so the driven gear can be fitted. This will stuff the sleeve so a new one will be needed.
Having said that, I did notice a bad mistake I have made and that is I fitted the speedi-sleeve onto the crankshaft and I have not fitted the drive gear for the cam and oil pump. I think I will have to remove the sleeve so the driven gear can be fitted. This will stuff the sleeve so a new one will be needed.
Cheers Cobba & Cobbarette
Coopernook, The Centre of our Universe
Working on more play time.
Please Log in to join the conversation.
3 years 7 months ago #215122
by cobbadog
Cheers Cobba & Cobbarette
Coopernook, The Centre of our Universe
Working on more play time.
Replied by cobbadog on topic McDonald Imperial Super-Diesel
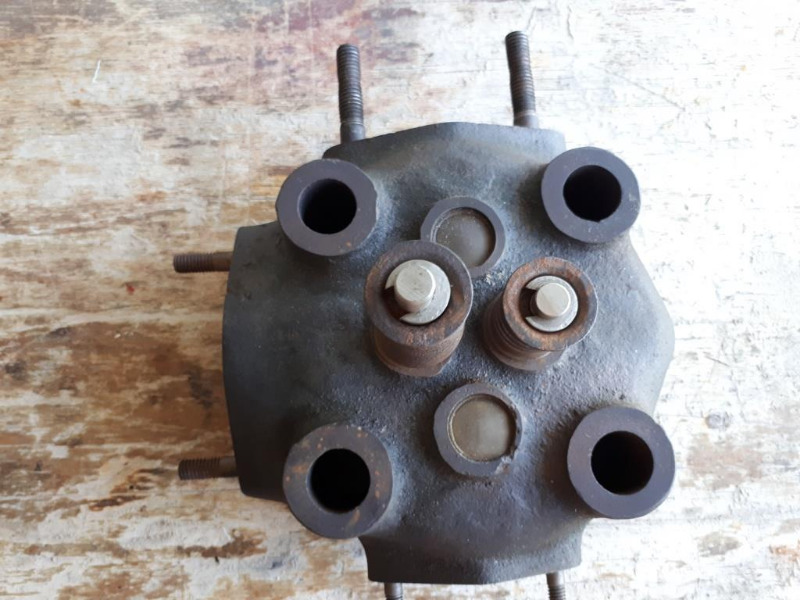
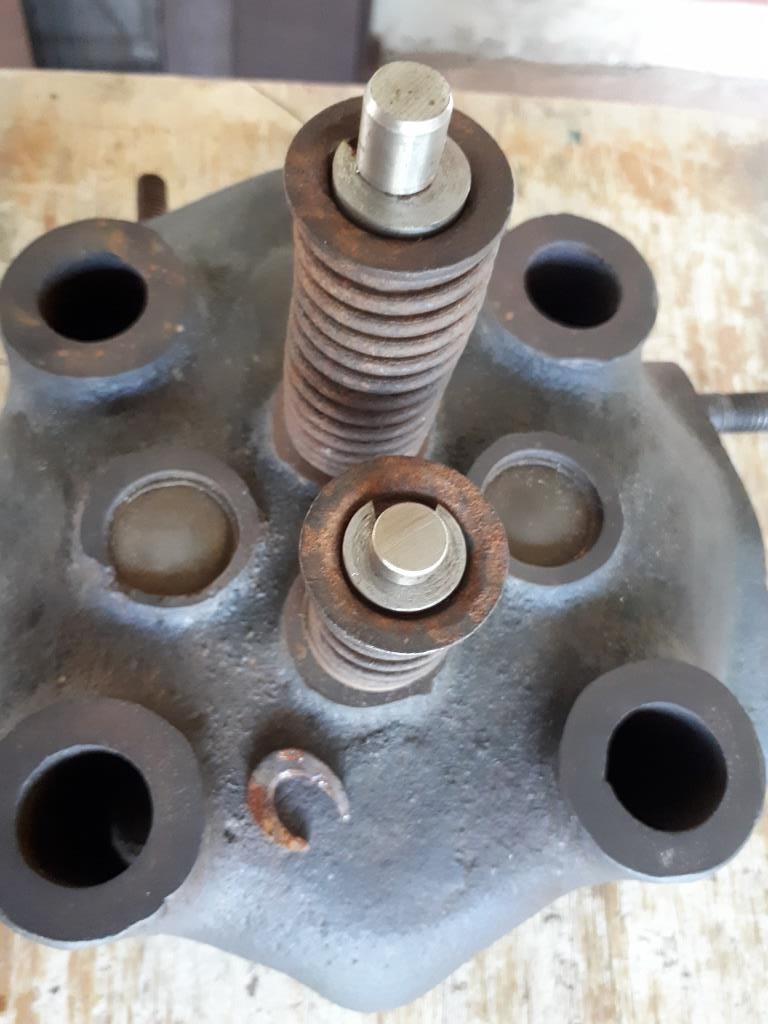
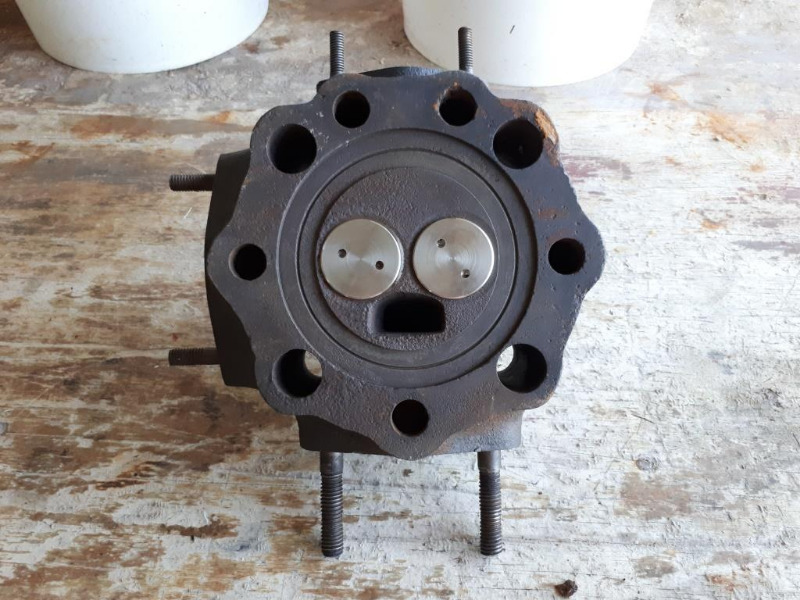
Well I now have the valves fitted and made the new colletts to hold the caps in place. You can see one of the original "C" clips that came with the engine, I much prefer mine. New valves worked out well and are a good fit into the new guides.
Cheers Cobba & Cobbarette
Coopernook, The Centre of our Universe
Working on more play time.
The following user(s) said Thank You: PaulFH
Please Log in to join the conversation.
3 years 7 months ago #215123
by cobbadog
Cheers Cobba & Cobbarette
Coopernook, The Centre of our Universe
Working on more play time.
Replied by cobbadog on topic McDonald Imperial Super-Diesel
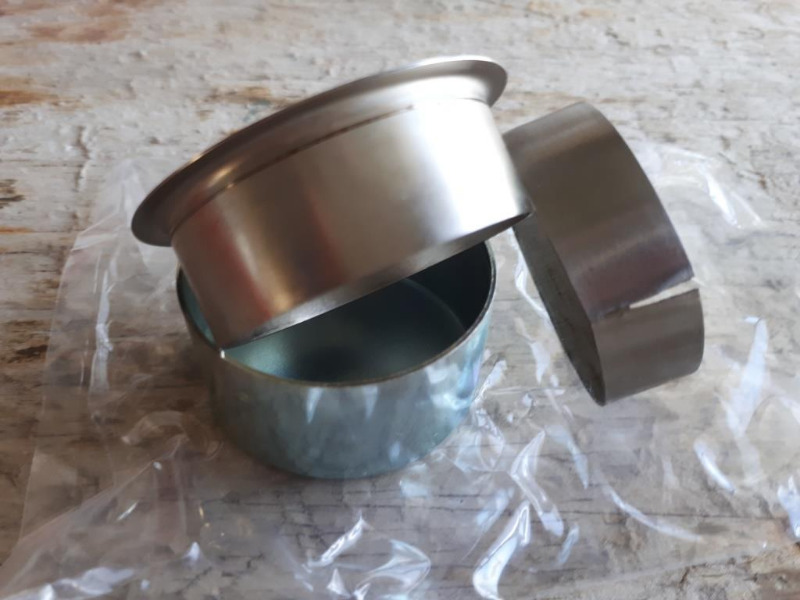
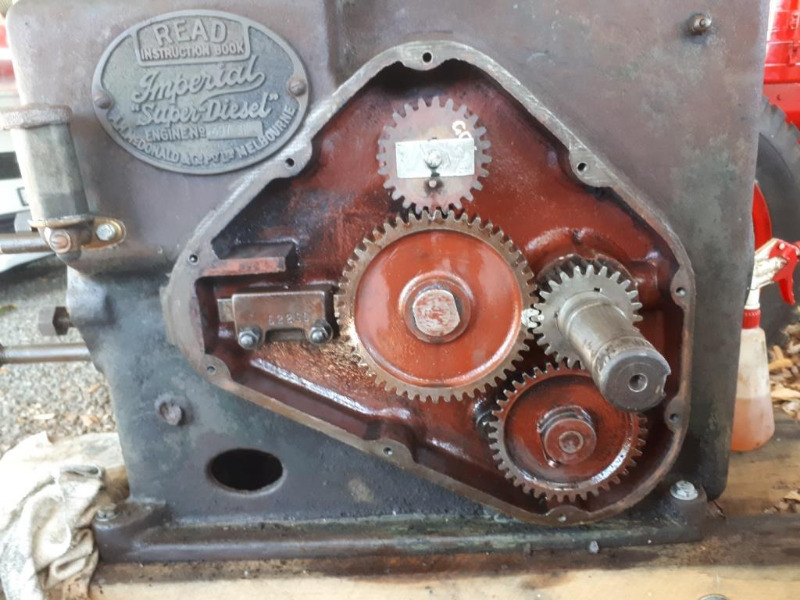
Next I started to assemble the driven gears for behind the side cover. First the new speedi-sleeve had to come off using a chisel, BUGGER!
Then slid the crankshaft driven gear in place being carefull to fit it onto the correct key, there is 2 there and I have no idea why. Then fit the cam gear and bolt the shaft to the engine case which is an odd thing but it works. Then came time to fit the governor gear and could not find the woodruff key so I will pick one up in town tomorrow and then installed the cam follower. Now if I was thinking straight I would fit the cam follower first then the cam gear but not me, I have to make it bloody hard for myself. Finally a pic of the old and new speedi-sleeve which wont be fitted until later. I also made a flat sheet metal section to hold the governor gear from sliding off the shaft. I never saw a washer or a bolt here when I stripped it but there is one now. The head of the small 1/4" Whitworth bolt just sits inside the width of the cam gear.
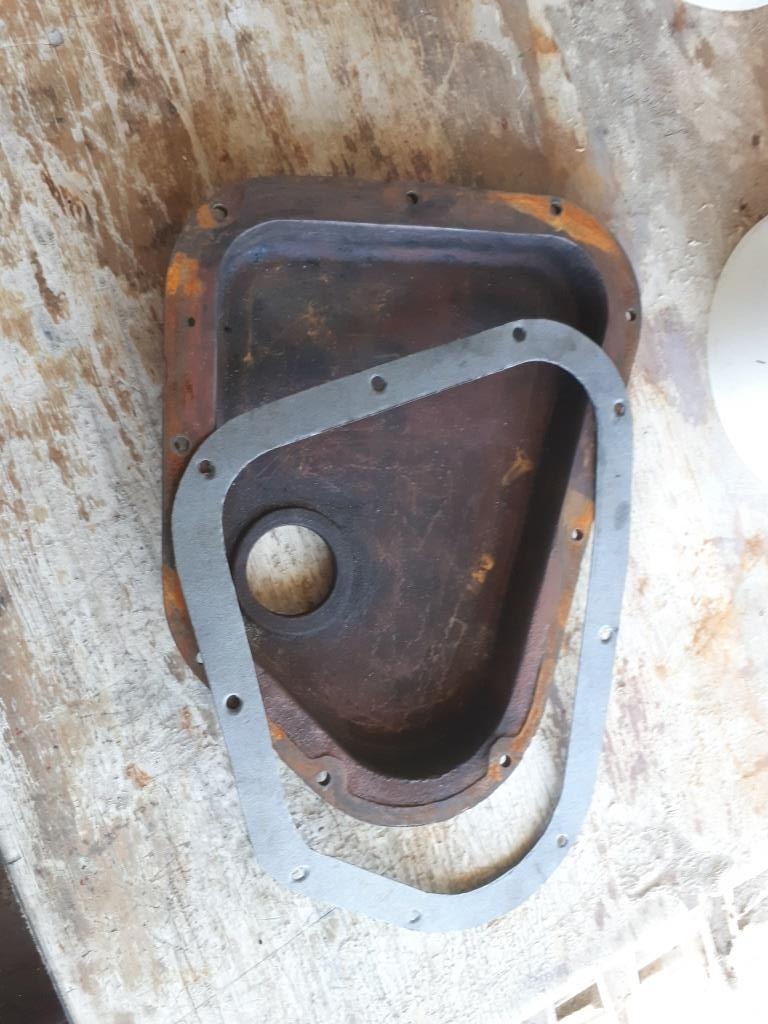

Then slid the crankshaft driven gear in place being carefull to fit it onto the correct key, there is 2 there and I have no idea why. Then fit the cam gear and bolt the shaft to the engine case which is an odd thing but it works. Then came time to fit the governor gear and could not find the woodruff key so I will pick one up in town tomorrow and then installed the cam follower. Now if I was thinking straight I would fit the cam follower first then the cam gear but not me, I have to make it bloody hard for myself. Finally a pic of the old and new speedi-sleeve which wont be fitted until later. I also made a flat sheet metal section to hold the governor gear from sliding off the shaft. I never saw a washer or a bolt here when I stripped it but there is one now. The head of the small 1/4" Whitworth bolt just sits inside the width of the cam gear.
Cheers Cobba & Cobbarette
Coopernook, The Centre of our Universe
Working on more play time.
Please Log in to join the conversation.
Less
More
- Posts: 6830
- Thank you received: 4757
3 years 7 months ago #215141
by Mrsmackpaul
Your better to die trying than live on your knees begging
Replied by Mrsmackpaul on topic McDonald Imperial Super-Diesel
Looking good there
Won't be long now
Paul
Won't be long now
Paul
Your better to die trying than live on your knees begging
The following user(s) said Thank You: cobbadog
Please Log in to join the conversation.
3 years 7 months ago #215143
by Morris
I have my shoulder to the wheel,
my nose to the grindstone,
I've put my best foot forward,
I've put my back into it,
I'm gritting my teeth,
Now I find I can't do any work in this position!
Replied by Morris on topic McDonald Imperial Super-Diesel
Cobbadog, You are doing an amazing job there. It is coming up better than new!
It is good to see that you are learning from your mistakes in the order of assembly so you will be able to do the next one easier.:evil:
It is good to see that you are learning from your mistakes in the order of assembly so you will be able to do the next one easier.:evil:
I have my shoulder to the wheel,
my nose to the grindstone,
I've put my best foot forward,
I've put my back into it,
I'm gritting my teeth,
Now I find I can't do any work in this position!
The following user(s) said Thank You: cobbadog
Please Log in to join the conversation.
3 years 6 months ago #215158
by cobbadog
Cheers Cobba & Cobbarette
Coopernook, The Centre of our Universe
Working on more play time.
Replied by cobbadog on topic McDonald Imperial Super-Diesel
Thanks very much for the positive feed back, but if this is coming up like new then the standards were poor! :woohoo:
New woodruff key at $0.50 and a new flared nut to replace that split one on the right hand side bush oil line is tomorrows job for starters. Then that head and rocker gear. This will test me out setting up the rocker set up. When you see it you wont believe the mongrel idea they had. But first I have to establish what thickness "O" ring will be best to use around the water tubes that connect to the head. The thickness of the head gasket can also effect the thickness of the "O" ring. I have made the head gasket out of some high temp paper but it is thin and when fitted sits inside a recess away from any combustion similar to a British Seagull outboard idea.
I am looking forward to Sunday and the chance to do something new for me, drive a milling machine. I had a quick look over it and sort of got it worked out and what I have to do is to mill 1/8" off each gib head key to suit the flywheels. Learning can be fun, I hope. At the same time I get to pay back the owner of the mill by doing a small soft soldering job and sweat a new connection to a lead. If only I could do more for him.
With at least one flywheel on I can then easily turn the engine over and see if the made up cam grind is close to doing what it should and that it operates as a 4 stroke and not a 5 stroke by opening valves at TDC. So the first few rotations will be bloody slow. Once as happy a a dog with 2 doodles I can fit the side plate and last flywheel, fit the injector and those linkages (another project in itself) and mount the water hopper and fuel tank which now has the right amount of surface rust to match the engine now, patina is what I think they call it, patina in spades.
Cheers Cobba & Cobbarette
Coopernook, The Centre of our Universe
Working on more play time.
Please Log in to join the conversation.
3 years 6 months ago #215176
by cobbadog
Cheers Cobba & Cobbarette
Coopernook, The Centre of our Universe
Working on more play time.
Replied by cobbadog on topic McDonald Imperial Super-Diesel
today was a day of just cruising through the little jobs that end up achieving a lot. I got the governor gear on and bolted in place with my new design flat washer and bog standard 1/4" Whitworth bolt and loctite. Next was the head gasket. I forgot I had some manifold gasket type paper given to me and it has the metal sandwiched between the paper top and bottom. I fitted the 5/8" ID "O" rings that were 1/8" thick and gave them a coating of STAG jointing paste to ensure a good seal. Sprayed the gasket with a copper head gasket spray top and bottom and fitted the head and that rocker assembly and pulled up the 4 head bolts.


Cheers Cobba & Cobbarette
Coopernook, The Centre of our Universe
Working on more play time.
The following user(s) said Thank You: PaulFH, oliver1950
Please Log in to join the conversation.

Time to create page: 0.590 seconds