A was for Austin, but now B is for Bedford
3 years 2 weeks ago #220488
by Swishy
OF ALL THE THINGS EYE MISS ................. EYE MISS MY MIND THE MOST
There's more WORTH in KENWORTH
Replied by Swishy on topic A was for Austin, but now B is for Bedford
All sounds a lot of hot air
LOL
cya
LOL
cya
OF ALL THE THINGS EYE MISS ................. EYE MISS MY MIND THE MOST
There's more WORTH in KENWORTH
The following user(s) said Thank You: cobbadog
Please Log in to join the conversation.
3 years 2 weeks ago #220492
by cobbadog
Cheers Cobba & Cobbarette
Coopernook, The Centre of our Universe
Working on more play time.
Replied by cobbadog on topic A was for Austin, but now B is for Bedford
This subject could also be covered in WheremEye. :woohoo:
Cheers Cobba & Cobbarette
Coopernook, The Centre of our Universe
Working on more play time.
Please Log in to join the conversation.
3 years 1 week ago - 3 years 1 week ago #220582
by PDU
Replied by PDU on topic A was for Austin, but now B is for Bedford
Coming back down to earth work continues on the framing for the rear of B for.
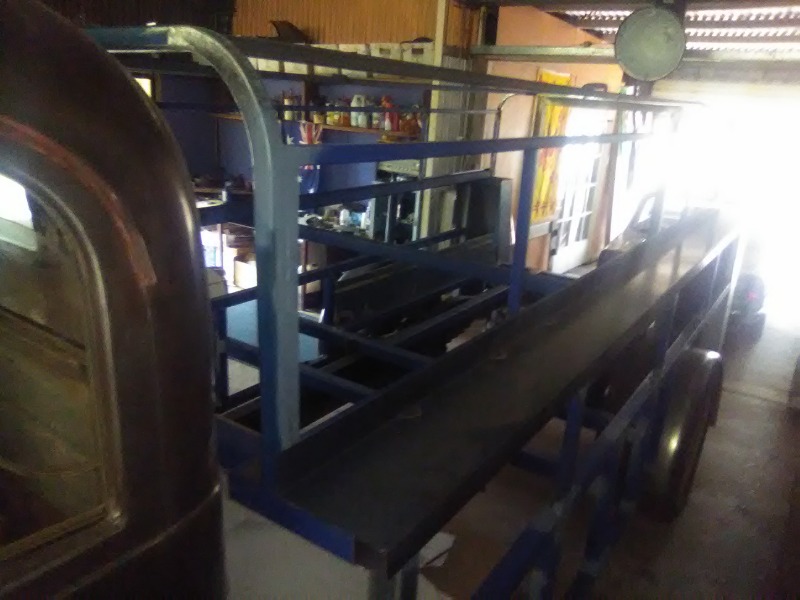
To support the upper outer edges of the turret I need to make up some curved sections of square tubing. The front and rear sections were made by slotting and curving some square tube, then welding and grinding - laborious. :S I discovered this method from Youtube, and the following method also.
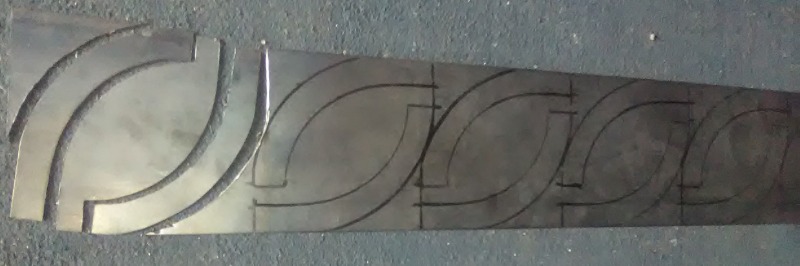
For the additional pieces I will be cutting the curved sections from sheet stock, joining them with flat strips (top and bottom) and then welding/grinding the corners, prior to locating them in the required place on the framework. Looks kinda labour intensive also.
I'm feeling a bit like I'm being framed? :whistle:

It will be nice to get onto the outer sheeting(?), yet to be organised . . .
To support the upper outer edges of the turret I need to make up some curved sections of square tubing. The front and rear sections were made by slotting and curving some square tube, then welding and grinding - laborious. :S I discovered this method from Youtube, and the following method also.
For the additional pieces I will be cutting the curved sections from sheet stock, joining them with flat strips (top and bottom) and then welding/grinding the corners, prior to locating them in the required place on the framework. Looks kinda labour intensive also.
I'm feeling a bit like I'm being framed? :whistle:
It will be nice to get onto the outer sheeting(?), yet to be organised . . .
Last edit: 3 years 1 week ago by PDU.
Please Log in to join the conversation.
3 years 1 week ago #220588
by cobbadog
Cheers Cobba & Cobbarette
Coopernook, The Centre of our Universe
Working on more play time.
Replied by cobbadog on topic A was for Austin, but now B is for Bedford
You are going great guns on the bodywork, well done. The cutting and pulling around straight lengths is how I shaped the sheet metal to repair the mower deck. As you say, labour intensive, but the outcome is all good.
Cheers Cobba & Cobbarette
Coopernook, The Centre of our Universe
Working on more play time.
The following user(s) said Thank You: PDU
Please Log in to join the conversation.
3 years 1 week ago #220615
by PDU
Replied by PDU on topic A was for Austin, but now B is for Bedford
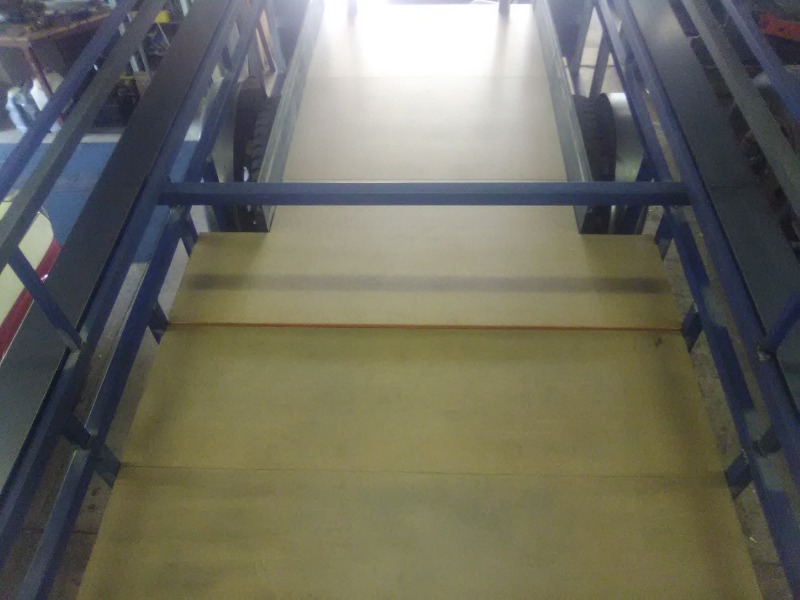
Applying avoidance tactics with the curved pieces I moved on to a trial fitting of the red tongue flooring. Despite some initial uncertainty about using these I feel sure they will be sufficient for my needs - NB
I have no intention of carrying heavy/dirty loads, plus they will be covered by a roof and not exposed to weather.
Narrowed one piece (across the width) but still have to add a slot for the plastic tongue. shortened two others (between the rear wheel arches) and cut the corners off another. All fitted in snugly after trimming to fit around the rear door posts, albeit with a 15mm section to trim off the back edge.")
Ignore the horizontal tube across the middle that is not staying there, simply assisting support of the "side steps" either side of the turret that have to be welded.
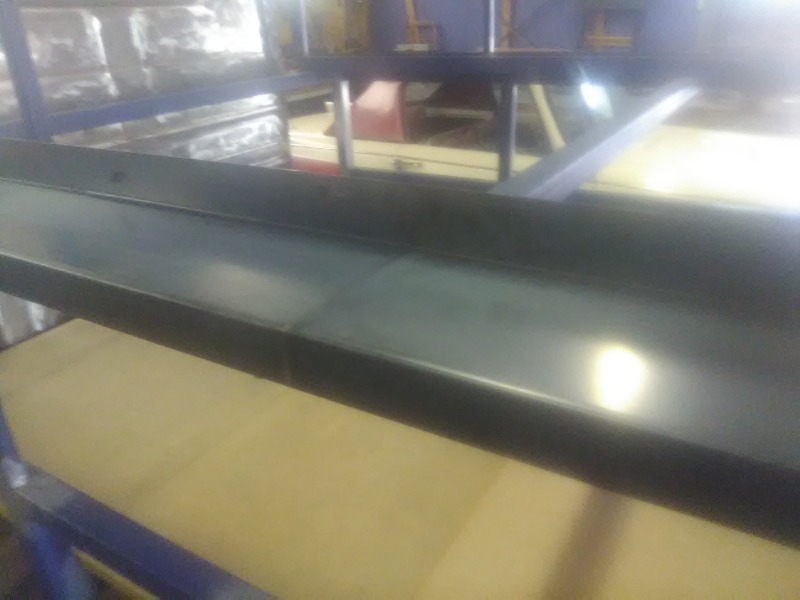
The sides for the two wheel arch boxes/seats made good use of the remains of the ex-road sign used for the bulkhead modifications. Pity it all has to come out again so I can paint the framing, but certainly looks better and is decidedly easier than stepping from cross-member to cross-member when working on the upper section.
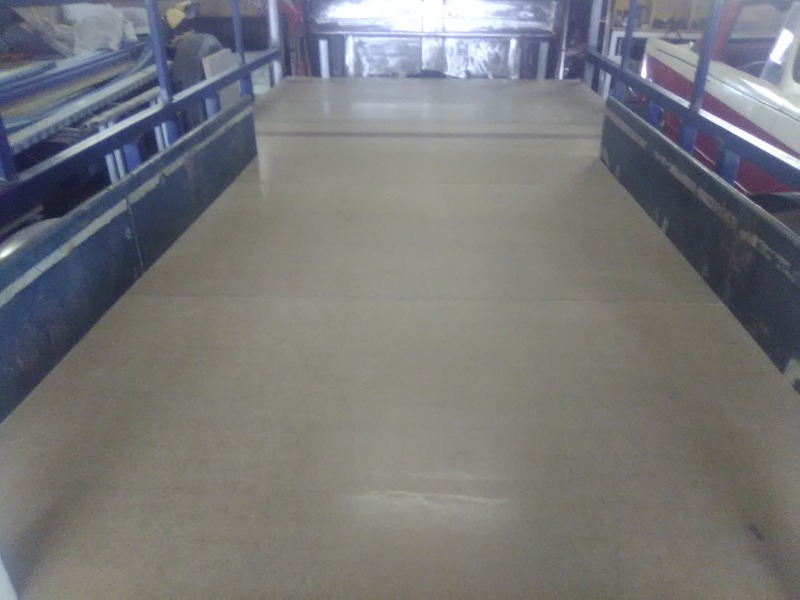
Any suggestions for sealing the underside, cheaply!? :side:
Narrowed one piece (across the width) but still have to add a slot for the plastic tongue. shortened two others (between the rear wheel arches) and cut the corners off another. All fitted in snugly after trimming to fit around the rear door posts, albeit with a 15mm section to trim off the back edge.
Ignore the horizontal tube across the middle that is not staying there, simply assisting support of the "side steps" either side of the turret that have to be welded.
The sides for the two wheel arch boxes/seats made good use of the remains of the ex-road sign used for the bulkhead modifications. Pity it all has to come out again so I can paint the framing, but certainly looks better and is decidedly easier than stepping from cross-member to cross-member when working on the upper section.
Any suggestions for sealing the underside, cheaply!? :side:
Please Log in to join the conversation.
Less
More
- Posts: 830
- Thank you received: 599
3 years 1 week ago #220619
by 180wannabe
Replied by 180wannabe on topic A was for Austin, but now B is for Bedford
Looking great PDU!
How about brushable Ormonoid for sealing the underside?
How about brushable Ormonoid for sealing the underside?
The following user(s) said Thank You: PDU
Please Log in to join the conversation.
3 years 1 week ago #220621
by PDU
Replied by PDU on topic A was for Austin, but now B is for Bedford
Thanks Brett, I'll give that a try, $35 for 4 litres from Bunnings is in my price bracket. :lol:
Please Log in to join the conversation.
Less
More
- Posts: 830
- Thank you received: 599
3 years 1 week ago #220626
by 180wannabe
Replied by 180wannabe on topic A was for Austin, but now B is for Bedford
I have only ever used it once, but was happy with the result. We bought it to paint the bottom 12" of some new replacement zincalume shed wall iron (before installation), going into a pre exisiting situation that couldn't avoid being in contact with the ground.
I'm pretty sure one coat applied by brush covered ok, and seemed adequate. The shed wall faces west, and the few inches of paint that is seen above ground has weathered very well.
I'm pretty sure one coat applied by brush covered ok, and seemed adequate. The shed wall faces west, and the few inches of paint that is seen above ground has weathered very well.
Please Log in to join the conversation.
3 years 1 week ago #220632
by cobbadog
Cheers Cobba & Cobbarette
Coopernook, The Centre of our Universe
Working on more play time.
Replied by cobbadog on topic A was for Austin, but now B is for Bedford
Ormonoid was the go to product back in the early 1970' when doing panel beating. Great for rust prevention, sound deadener and it even got used once as a rattlllle remover behind some poor buggas dash board, but it worked. I be anyone who went thereee at a later date to fix a wire or replace a globe in the dash board will be most pleased.
I always have it on board at home. Here's a good tip, buy a body shultz gun to spray it on with. Fleabay sell them cheaply and they work well but is important to really wash it out well after use or it will be a one hit wonder.
I have not used it on timber b efore but cant see an issue with it being used there. You are going great on this build and is fantastic to se the progress as it happens.
Cheers Cobba & Cobbarette
Coopernook, The Centre of our Universe
Working on more play time.
The following user(s) said Thank You: 180wannabe
Please Log in to join the conversation.
3 years 1 week ago #220636
by Lang
Replied by Lang on topic A was for Austin, but now B is for Bedford
It is great for unlit areas.180wannabe had success on his shed sheeting but it really fails in direct sunlight. Pretty sure the tin says to cover it with silver if exposed. I did the top of two rusty containers very thick multi coats to fill the holes but did not top coat it. Started leaking after 3 months. Melted and sagged through the big holes or got hard and shrank and cracked in thinner areas.
Ideal for body deadener but a hell of a mess if it ever gets petrol on it.
Lang
Ideal for body deadener but a hell of a mess if it ever gets petrol on it.
Lang
The following user(s) said Thank You: 180wannabe
Please Log in to join the conversation.
Time to create page: 0.629 seconds